Double Cast On Method
Feb 9th, 2010 Posted in articles | Comments Off on Double Cast On Method
By Martha McGrath, Article courtesy of www.deerrunsheepfarm.com
* LAST TWO MONTHS of gestation- “condition score” ewes, feed well.
You should have a general idea of when your ewes will lamb. There are
In the last newsletter, I told you about our experiences feeding a Reduced Hay Ration. We continue with that in late gestation (the last two months), making sure the ewes get enough energy and protein for their growing lambs and future lactation. The trace minerals are important, too, especially the calcium/phosphorus ratio, and selenium in areas where the soil is low. (see my “milk fever” article for more info.)
* LAST MONTH- vaccinate, deworm, shear.
I like to vaccinate with CD&T and deworm the flock about 3 weeks before the first ewes are due to lamb. I use Levamisole (Tramisole) wormer because it is safe in late gestation, and effective on dormant larval stages (hypobiosis). I deworm the ewes again at lambing, when tagging and docking the lambs. I also like to shear the ewes at this time. I have shorn as late as the actual due dates (once had to put one ewe out of the holding pen while she lambed) without it seeming to affect the ewes, but I would rather not wait that late! Pre-lambing shearing makes things easier on me. I like to be able to see udders and vulvas as the ewes are at the feed trough. It also keeps fleeces cleaner, and allows newborns to find the udder. Some say that shorn ewes will seek shelter with their babies in bad weather, while ewes in full fleece may not. If you can’t shear, it is a good idea to crutch, or shear the wool under the tail and close to the udder so that the newborn can find the teats easily. Our Coops are pretty wooly, so I usually have to shear the inside of the hind leg then, too.
* LAMBING- leave ewe alone if she is making progress.
I check the ewes about 4 times a day at lambing time;
at feeding (morning and about sundown),
mid day,
and just before bed .
Many knowledgeable people recommend that you not bother the ewes in the middle of the night, because this can cause them to go in to labor after you go back to bed!
Ewes that are close to lambing will usually have a large milk bag the last week or so, then a swollen, pinkish vulva in the last few days. A clear mucus discharge means she is dilating, and close to lambing. She will probably want to be alone, and will start pawing and getting up and down. Keep an eye on her (binoculars are great!) but don’t bother her. If all is well, a balloon-like water bag will soon appear, followed by the lamb’s 2 front hooves and nose. Don’t worry if she gets up and down, and everything slides back inside her. If the ewe has been pushing for an hour, and you can’t see anything, there may be a problem. You will have to call your vet, or scrub up and “go in”.
Do you want to pasture lamb or barn lamb?
We do sort of a combination. I let the ewes lamb on pasture, then pick up the lambs and the ewe USUALLY follows me to the barn, where I put them in a “jug”, (a 5 X 5 foot pen).
Ewes with singles stay for one day, twins for two, trips for 3.
I like to “strip, clip, and dip” in the jug.
I strip the teat to make sure the plug is gone and she has colostrum,
clip the umbilical cord to about one inch if it is too long,
then dip the cord in iodine.
The ewes do not need grain while in the jug, only hay and fresh water. Woody Lane, who writes a column for Shepherd Magazine, recommends that you feed alfalfa pellets to the ewes in the jugs, as it is easier to manage. He says that it will not cause digestive problems, since it is made from pelleted alfalfa hay.
I like to bring the ewes and lambs into the barn in the jugs because it is easier for me to spot any problems, worm the ewes again, and weigh, dock and tag the lambs. I dock and castrate with rubber bands a few hours before the lambs are due to go out of the jugs, because I’ve read that the pain of docking too soon after birth can interfere with the lamb drinking that first, important colostrum. The newborn lamb’s stomach has a special ability to absorb antibodies from the colostrum, and the newborn fat reserves only last about 12 hours.
I no longer castrate most of the ram lambs. The Muslim market prefers intact rams.
If all goes well, after a few days the ewe and newborn lambs are put in another pasture with other new moms. While in the jugs and on pasture, walk through a few times a day. Make any sleeping lambs get up- a healthy lamb will stretch, then find mom! A sick or starving lamb will either not get up, or stand hunched up.
When I have lambed on pasture in May, I carried a diaper bag to the pasture to hold ear tags, docking pliers and bands, and my record book. I took care of tagging and docking there in the field, and then left the moms and babies alone.
The BASIC RECORDS that I keep are-
Lamb ID#, Dam ID, Sire ID, Date of Birth, Birth Weight, Birth Type (Single, Twin, Trip.), Color, Sex, Concieved (#1 means born in first 21 days after ram turned in, #2- born after first 21 days), Live (birth- Y for yes, N for no), Raised (1 for sing., 2 for twin) Weight 1, Weight 2, Weight 3 (usually 30, 90, and 120 days) and Disposition (meaning sold for meat, sold for breeding, kept in flock).
I made an Excel Spread Sheet to record this info for each year. I usually do the weights at the same time as worming and vaccinating the lambs, so I note that on the sheet, too.
I also have an individual sheet for each breeding ewe that contains her pedigree and production info, where I list ID numbers for her lambs born, birth dates and weights, lamb sire ID, and ewe yearly fleece weights. This sheet goes with the animal if it is sold.
When giving the lambs an ID number, I like to incorporate the year they were born in the first 2 digits, so 9608 was the eighth lamb born in 1996, and 0403, the third lamb born in 2004. I ear tag ewes in the right ear, rams in the left.
(See LAMBING RECORDS FOR RAISING PERFORMANCE RECORDED SHEEP by Hope Yankey for more on record keeping)
LAMB DEATHS-
The majority of lamb deaths occur in the first week, frequently from “SME” complex. That stands for Starvation, Mismothering and Exposure. Other causes can be starvation due to sharp teeth in lambs, or starvation because the newborn has not passed the meconium (first tarry feces) and is constipated. An enema works wonders in this case. I have had an occasional infected navel or tail dock, also, and these can be life threatening. Common causes of death in older lambs are parasites, pneumonia, and predators.
* LAMB CARE- Vaccinate with CD&T at 4, 6, and 8 weeks, deworm starting at 6 weeks.
I think that three enterotoxaemia shots are cheap insurance. Have fecal tests done to make sure that your worming program is effective. There are kits that you can buy to do your own fecal tests. Rotational grazing and renting clean pastures can reduce the need for worming. I have little experience with these, though.
LAMBING KIT
Adapted from Care of Ewes and Lambs at Lambing Time
By: Helen A. Swartz, Ph.D., Missouri State Sheep, Goat & Small Livestock Specialist
7% Tincture of iodine -for disinfecting lamb navels.
Eartags -for lamb identification.
Lubricant (K-Y Jelly) -when assistance is needed by the ewe.
Elastrator bands -for docking and castrating.
Stomach tube and 60mm syringe-for lambs unable to nurse.
Balling gun -for boluses, capsules and pills.
Bottles and nipples -for orphan lambs.
Sulfa -for infections and treating Coccidosis.
Antibiotics -for infections.
Pepto-Bismol -for diarhea.
Mineral Oil or Enemas -for constipation block.
Drenching syringe -for deworming.
3cc, 10cc and 25cc syringes and 18 -20 ga. needles -for various treatments.
Nylon rope or equivalent -for pulling lambs.
Knife -for foot trimming.
Shearmaster -for crutching and shearing.
Rectal thermometer -for sick animals.
Heat lamps, paper towels and rope halters.
Scale and Lamb record notebook!
See my Sheep Links, Lambing and Lambing Problems, for more info.
Martha McGrath Deer Run Colored Coopworth Sheep in WV www.deerrunsheepfarm.com Your clicks fight hunger at The Hunger Site! www.thehungersite.com
The fulling stage occurs when the felt becomes a solid piece of fabric. In order for the felt to shrink down, it must be agitated in some way. There are many methods of fulling, but rubbing and rolling are the two most popular ways. To speed up the fulling process, it is a good idea to warm the felt before fulling by either dipping the felt in a tub of hot water or pouring hot water over it and working it through.
 The rolling technique uses a bamboo mat (or something similar) to roll the felt until it has shrunk as much as possible. Place the bamboo mat in front of you with the reeds lying horizontally on top of a towel (the towel helps keep the mat from slipping around). Lay the felt on it and roll it up inside of the mat. Begin by rolling the mat back and forth. Open up the mat and shift the felt ninety degrees and roll again. Once again, the felt will shrink in the direction that it is rolled. Continue turning and shifting the felt until it is thoroughly fulled.
 The rubbing technique for fulling uses a felting board or a washboard to rub the felt across until it has shrunk as much as possible. Place the board down in front of you with the ribs running horizontally, then put the felt down on the board. Begin gently rubbing the felt until you notice that it is starting to shrink and develop a puckered surface texture. Straighten out the piece, turn it ninety degrees and continue rubbing. The felt will shrink in the direction that it is rubbed. Rub on both sides and at all angles to ensure a uniform size and shape. Determine whether or not the felt is completely fulled by pulling it. If it stretches, then continue fulling until it is quite firm.
 Other fulling techniques that can be used are throwing, stomping or pounding. These methods are a fabulous way to work off tension! Any form of agitation will help to full the felt, though some methods are more appropriate depending on the project.
 Never leave soap in felt for longer than twenty-four hours. The soap can possibly disintegrate the fibers and can also change the dyes. If you have to leave a project, rinse all of the soap out, gently wring out the extra moisture, and set the felt aside to dry. Do not put wet wool in a plastic bag-moldy felt is gross. You can always come back to your project later, rewet with warm soapy water and start where you left off.
For the final rinse, run warm to hot water over the felt until the water runs clear and free of all traces of soap. Finish with a rinse of cold water. Blot out the excess water by rolling the felt inside a towel. Or put the felt in the spin cycle of the washing machine.
 Reshape the felt and smooth it with your hands, or better yet, press it with a hot iron. Remember that wool has an incredible memory and will dry exactly as it is left. It will take about twenty-four hours to dry completely. Sweater drying racks are perfect for drying-they allow air to get to all sides of the piece. Care should be taken if hanging a felted piece for drying, since the weight of the wet wool may distort its shape. Don’t forget to measure the size of your felt after you are finished.
 The finished sample shows the results of the entire process.
Feltmaking may be a new experience for you. Try a sample-you may find a whole new outlet for your creativity.
 With the netting still in place begin to gently rub the wool all over in a circular motion. Make sure that the net does not become attached to the wool. If there is too much pressure, the wool fibers will come up through the netting or the fibers will visibly move around.
 Carefully pull the netting away from the wool, keeping one hand next to the wool so that the fibers do not lose any connections. In the beginning of this stage, barely skim the fibers and gradually add pressure as the wool turns into felt. Once the first side has been worked for a while, flip the felt over and continue working on the other side. When the water gets cold, squeeze out the excess water and rewet the wool with hot water.
 To determine when the wool is to the soft-felt stage, try the pinch test. Pinch some of the fibers between your fingers and pull up. The wool should come up in one solid mass. If the fibers separate from each other in their individual layers, then rub some more.
 Once the wool has reached the soft-felt stage and passes the pinch test, it is time to go on to the next step, or if you need to finish it later, rinse the felt and set it aside to dry. When you are ready to continue the felting process, rewet with hot soapy water and proceed.
 Palming is a very important step in feltmaking, coming between the soft-felt stage and the hard-felt stage. Once the wool is holding together in a cohesive mass, hold the wool piece between your palms and rub back and forth. The palming action starts the fulling process and ensures that the fibers tangle tightly together. If shapes are cut, palm the edges so they will not stretch and be distorted.
Information provided by Shelby Cefaratti’s website
Once you know how well your fiber will felt and decide the kind of project you would like to make, you need to prepare your fibers. Make sure that you use an appropriate fiber for the project. If you start with grease in the fleece, you will need to clean and comb or card it before you can use it for feltmaking. Use roving or carded batts for ease and simplicity. A favorite fiber to felt with is merino. It is a little more expensive than some other fibers, but it felts quickly and easily and is available in a wide variety of dyed colors.
 The easiest way to pull off even tufts of roving is to hold the length of roving in one hand and grasp the ends of the wool between the fingertips and palm of the other hand. Gently pull the wool and a small tuft will come away from the roving.
Place a small tuft of wool down on the felting surface. Place the next tuft of wool at the edge of the first horizontally. You will be working on the width of felt. After you have laid the wool out to approximately 12 inches wide, it is time to add the next row.
 Place a small tuft of wool down on the felting surface. Place the next tuft of wool at the edge of the first horizontally. You will be working on the width of felt.
 After you have laid the wool out to approximately 12 inches wide, it is time to add the next row.
Place a tuft of wool at the edge of the first tuft, overlapping the thin edge of the first with the thicker edge of the second. You want to achieve a sort of shingling effect. Continue laying out the fibers until you have the size and shape that you want.
 Lay out the second layer in the same manner, but at a 90 degree angle from the first layer. Continue adding layers—4 to 6 thin layers rather than 2 thick ones. The thin layers give you more control in achieving overall even layers and also allow more opportunities for fiber connections. Think about it like a weaving project: the tighter the sett, the finer the fabric—the greater the number of fine layers, the better quality the felt. Before proceeding, gently press down all around the wool and check for thin spots. If there are any thin spots, fill them in with more tufts of wool. Thin spots can become holes in your felt.
 Cover the wool with a piece of netting big enough so that the netting extends over the edges of the wool.
 Dip your sponge in the warm soapy water. Place the wet sponge in the center of the wool and press down, wetting the wool and pushing out the air. Continue wetting the wool, keeping the netting in place. The net keeps the wool from moving and sticking to your hands. The wool should be completely wet and soapy. Check to see how wet the wool is by pressing your hand down into it-if suds and water pool up between your fingers the wool has too much water. Dab the wool with a towel to absorb the excess water, but do not absorb too much moisture-there is a fine line between too wet and not wet enough. If the fibers are too wet or too soapy, they will float away from each other instead of felting together. The wool should lie flat. If there are bubbles in the wool, then it is not wet enough. Add more hot soapy water with the sponge.
 Remove the netting and carefully fold over any loose edges and press them into the wool.
 Now, add other small contrasting bits of wool or yarn for embellishment. Then replace the netting, and wet down the new wool. It will “melt into” the primary wool.
Editor’s Note: You should be basically familiar with the parts of a spinning wheel. If not, please Open this window which will show you a diagram of a spinning wheel for reference. Open a diagram of the spinning wheel
We will begin by looking at the heart of the machine, the flyer mechanism.
Start the flyer inspection by disconnecting the drive band. With the flyer
mounted in the maiden bearings, give the flyer a twirl and see how freely it rotates.
(You may need to turn the maidens a bit to position the bearings a little better).
Next remove the whorl from the flyer shaft. Most double drive flyers are left hand thread (opposite from a normal bolt thread) although I’ve noticed some mass
produce manufacturers use a right hand threaded whorl. Be careful not to use extreme force if you are not sure which way the thread comes off. It should
be snug but if it appears it won’t come off, try the other direction.
With the whorl removed, slip off the bobbin and take a look at the flyer shaft.
There should be no burrs or large machining marks visible.
Check the end that rides in the rear maiden bearing. Is the surface very smooth?
Polished? It should be very smooth with no burrs or sharp edges.
Next look at the shaft part on which the bobbin bearings (if provided)
will ride on the shaft. Is there visible wear? Run a fingernail down the length of the shaft to check for ridges that indicate bearing/shaft wear. This will indicate that either the shaft material is too soft or that the bobbin bearing material is not matched to the shaft hardness.
Flyer Shaft Materials:
Plain Steel (Cold rolled): (NOT BAD DEPENDING)
Easily machined and threaded. Too soft for most bearing materials, easily burred and scratched. Not hardenable by economical means so most likely will not be hardened.
Rusts easily kind of a dull metal color.
Brass: (POOR)
Very easily machined and threaded but very soft. Contrary to some advertisements, brass (by itself)
is not significantly hardenable. I strongly suggest you avoid soft brass flyer shafts.
If unsure how soft it is, try to scratch (somewhere unimportant) with
a nail file. Should not be scratchable if it is avoid it.
Probably a bright yellowish color.
Bronze: (BETTER)
Better than brass but still quite soft. There is one bronze alloy that can be
acceptable if using only soft bobbin material, (plastic, leather). Sorry do-it-yourselfers
but you’ll have to do your own homework for the alloy number.
Color: Orangeish
Tools steels and drill rod: (BEST)
These are the best for long bearing wear and shaft smoothness characteristics. They
are easily hardened but depending on the composition type may not be very
round once hardened. These are normally hard enough for most bobbin bearing types without additional heat treatment.
These are the only shaft materials I would approve of for using bronze bearings in the bobbins. Appearance: Shiny and bright.
Common Bobbin Bearing Materials:
Wood: (POOR)
Some bobbins are supplied with only a close fitting hole drilled.
Avoid these. Very cheap construction method. Noisy with high friction coefficient.
Leather: (BETTER)
Bronze, Oilite: (BETTER)
These bearings are a porous sponge like material that are factory impregnated with oil and release the oil inside with heat generated from rotation on the shaft.
These should only be used with a tool steel or drill rod flyer shaft.
Cast Bronze:
These need frequent oiling though personally I prefer these to “oilite”
Bright Orangeish color. Should only be used with a tool steel or drill rod shaft.
Plastic Bearings:
So many varieties available though most makers and “craftsman” use the
cheaper ones which have a higher coefficient of friction (they aren’t as slippery).
As follows ratings with color and appearance.
UHMW (POOR)
White, white with visible burrs
NYLON (POOR)
Milky white with visible burrs. Not very slippery.
DELRIN (BETTER)
Mostly black or white depending. Better than NYLON but not real good for a continuous motion bearing.
TEFLON (BEST)
Milky white but less translucent than NYLON. Easy to tell the difference as they are very slippery.
VERY BEST:
For business reasons I won’t identify the trade names of the following
but any of the following colors of bearings are most likely very good bearings
for any shaft materials (if polished). As far as I know we are the only
wheel maker using these bearings as they can be as expensive as $6.00 a piece,
though make spinning a true joy.
-GREEN
-BROWN
-ORANGE
-BEIGE
Please review our videos of spinning from our articles page here:
Deer Run Sheep Farm
Country of origin: New Zealand
Brief history: The COOPWORTH is an easy care, productive breed developed at Lincoln University in New Zealand during the 1950’s and 1960’s under the direction of Dr. I. E. Coop.
He wanted to improve the reproductive performance of the Romney, which dominated the New Zealand sheep industry. Border Leicester rams were bred to Romney ewes, and the offspring were selected on individual performance, resulting in a ewe that easily lambs twins or triplets and raises them unassisted. The Coopworth lamb is vigorous at birth and fattens on grass and mother’s milk. It has grown to become the second most numerous breed in New Zealand.
Coopworths were first imported to the United States and Canada in the late 1970’s and are still a rare breed in North America. Coopworth fleece is popular with handspinners who find the wool easy to spin.
Fiber characteristics: The wool is silky with a “high spiral-type” crimp, a bright luster, and pointed at the tips. Staples may be round or flat.
Average fleece weight: Fleece weights average 10-13 lbs.
Average fiber length: The staple length is 6-8 inches.
Bradford spinning count: 46-50.
Micron diameter: 35-39
Colors: White, black, grey, blue
Method of preparation: Easy to process. Ideal for combing, carding, spinning in the grease.
Spinning techniques: Easy to spin. Best spun as a medium to bulky yarn, being careful not to overspin or overply, as you may lose the silky appearance.
Recommended uses: An all purpose yarn, outerwear, weaving (warp or weft), stronger fleeces are good for rugs.
Purchase information: Deer Run Colored Coopworth Sheep in Franklin, West Virginia
References:
American Coopworth Registry
Spin-Off Magazine 9/89
In Sheep’s Clothing
Black Sheep Newsletter-Summer ’90
Fleece in Your Hands
This article was written for a “Fleece Exchange” I took part in.
Martha McGrath 304-358-2239 Deer Run Colored Coopworth Sheep in WV www.deerrunsheepfarm.com Your clicks fight hunger at The Hunger Site! www.thehungersite.com
by Marguerite Nelson- owner of Bella Tessere
 Your spinning wheel is a valuable piece of equipment, treat it like a piece of fine furniture. Don’t place the wheel in the direct sunlight for long periods of time. Don’t leave it near a heating vent or stove or fireplace. We live in an extremely dry area and wood dries out fast enough without exposing it to additional heat.
If your wheel isn’t finished, finish it as you like and then periodically oil or polish it as you do your other furniture. Do not, however, oil the grooves where the drive bands or brake bands go.
Be very careful whenever you move your wheel for any reason. Never pick up a wheel by the drive wheel, always pick it up by the bench. When you put your wheel in a car, place it so it will not move around, I always treat my wheel like another passenger and it gets its own seatbelt.
Children are fascinated by spinning wheels, if your wheel is too fragile to handle the attentions of a child, then keep it out of their sight! Many wheels are sturdy enough that a child would have a difficult time doing any damage to them.
Keep your wheel clean, if you have been working with a dirty fleece, or if you live out in the country on a dirt road, keep it dusted, it will work better if you do.
Your wheel needs to be oiled, using a 30 weight motor oil about every two hours of use, or when you change the bobbins, whichever comes first. Make sure to wipe off any old oil and dirt before you add new oil. Every moving part on the wheel needs oil, unless it is a sealed bearing.
Adjust the tension on your wheel by starting with no tension and gradually tightening it until it is where you need it to be. The more tension on your wheel, the harder you have to work.
The following was posted to the knitting list by Margaret K.K. Radcliffe, of Maggie’s Rags, Thanks to her for permission to post it here.
——————————————————————————–
My daughter wanted to learn to knit when she was 3, but I found that she needed help in forming every stitch. She enjoyed knitting with me, but she just didn’t have the dexterity to manage two needles and yarn. When she got bored with it, I didn’t mention it again. When she was just turned 5, she found her knitting bag and brought it to me, asking me to show her how again. We were both pleasantly surprised that she could handle it on her own.
The Waldorf School programs use knitting as a learning tool (great in lots of ways, developing familiarity with natural fibers, dexterity, math skills, design skills, spacial recognition, etc.). One of the basic rules for a beginning knitter is to use natural fibers, and the easiest to work with is wool, so start with wool.
Then, instead of introducing a tool like a knitting noddy, needles, or crochet hook, teach “finger knitting” to begin with. This is just crocheting a chain, but with your fingers. When there is no tool to be dropped and picked up, the child can just get used to the feel of the yarn, and can make a satisfyingly long chain very quickly. These chains can be pulled out and done again, used to join a pair of mittens, chained again to make hair ribbons or belts, used on dolls, as bridles on toy horses, to tie up a younger sibling…you get the idea.
After finger knitting is mastered, move to a knitting noddy or a crochet hook. I found that a big problem when starting off was dropping one of the two needles all the time. When your child wants to move to two needles, then cast on for her, and knit the first row for her. The Waldorf School uses a rhyme to help children remember what to do:
In through the front door
Around the back
Out through the window
And off jumps jack.
Also, don’t fuss over mistakes. If yarnovers result in extra stitches, just make up a little story (about how little birdies flew in and sat on the branch, but now it’s time for them to fly away), and make any corrections necessary to make the piece knittable again. Dropped stitches can be birdies who fell out of the nest, and you can be the mommy bird picking them up. I know this sounds like drivel, but little ones love it. The rhyme and the suggestion for storytelling come from an article in Cast On.
To help ensure success, start will a good quality worsted weight wool yarn, to make it easy. Use wooden needles, because they won’t slip out as easily. And use fairly large needles (like a size 10). Children can make their own needles. Buy some beads at a craft store, and some dowel that fits into the hole. Cut the dowels to length, sharpen in a pencil sharpener, and sand them to make them smooth and round off the points. Glue on the beads at the other end. We made some size 13 wooden needles, but they were really too big. The second set was size 10 and worked much better for a child.
Start with knitting garter stitch swatches, but you can make it interesting by using different colors to make stripes. Let the child decide when the color should change. At our house, these swatches were doll house rugs, placemats for tea sets, or blankets for tiny horses and dolls. Your child’s imagination will decide what they really are.
On the other hand, you could follow the example of EZ’s mother. She let EZ knit 2 or 3 stitches on her own knitting, and then told her she could knit a few stitches the next day if she was good.
Just keep in mind that children learn by imitation, and what your daughter may really want to do right now is to pretend that she can knit like mommy. My two year old is perfectly happy with a large crochet hook, a yard of yarn, and a swatch to pretend with.
Margaret K.K. Radcliffe,
Maggie’s Rags
by Sivia Harding
As someone who was a new knitter not too terribly long ago, I make it a point to try new things whenever possible, or incorporate new ways of doing the same old thing into a project. Thus, having heard about the tubular cast-on and seen pictures of its smooth, rolled edge, I decided to use it the next time I started a sweater in ribbing.
After consulting two experienced knitters and three books, and seeing many different ways to make the cast-on, I made a few swatches. This is a report on what I found was the easiest way to achieve that nice edge in a K2, P2 rib.
 This cast-on starts provisionally, in other words with waste yarn that will be removed later. You can use your favorite way to do this, or (as I did) simply knit two rows of stockinette stitch, starting with a purl row, in a smooth yarn approximately the same weight as your project yarn. Cast on half the number of stitches you will need for the finished piece, plus one. In other words, if your finished piece requires 44 stitches, cast on 23. After casting one, purling one row and knitting one row in waste yarn, then take your project yarn and continue with stockinette for four more rows, ending with a knit row.
Here is where the fun starts: purl the first stitch, and then with your right needle, pick up the first stitch in the row, four rows down, where you started your project yarn. You will see the row clearly as a row of different-coloured purl bumps surrounded by the waste yarn. Transfer the picked-up stitch to the left needle and knit it. Continue on, purling a stitch from the left needle, then picking up a stitch from below and knitting it, all the way across the row. You will have 45 stitches in K1, P1 rib.
At this point the waste yarn has fulfilled its purpose and can be removed. The simplest way to do this is to cut it close to the knitting and pick out the threads. Or, if you are like me and enjoy saving every bit of yarn, pull the yarn out one stitch at a time. You will be left with a smooth, elastic edge and one row of ribbing. Your four rows of stockinette have been rolled up like magic.
 Now, you might ask, how to get that nice K1, P1 edge to transform into K2, P2 ribbing? Easy. On the next row, cross every other two purl/knit stitches to make the proper sequence of purls and knits. Again, the easiest way I found to do this is to switch the stitches on the needles as you come to them. If this sounds too complicated (although it isn’t!) you can always use a cable needle to hold every other purl stitch to the back for one stitch, in effect crossing it to the back of the next knit stitch, then slip it onto the left needle and purl it. The result will be 44 stitches of K2, P2 ribbing, with one extra stitch to be decreased at the end of the row.
When I tried this, I was worried that the crossed stitches would show and look terrible, but they show only minimally, especially when a forgiving fibre like wool is used, although one side, which you can make the back of the piece, shows slightly more than the other.
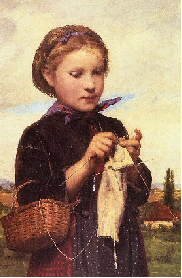
I also tried this cast-on for ribbing in the round. (See the pink knitting in the picture below.) It worked quite well when I joined the round on the “crossing” row. The yarn tail can be used later to darn the edge together for a seamless look. I hope you will enjoy using this technique for lovely ribbed edges.
NOTE: Thanks to Paulette Lane and Rebecca Lau of the West Coast Knitters Guild in Vancouver, BC for sharing their time and expertise with me.
My other references were “The Harmony Guide to Knitting as a Creative Craft,” page 19; “The Big Book of Knitting,” by Katharina Buss, page 22; Knitters Magazine, Summer 2001, “Taming the Tubular Cast On Part 1,” by Charlotte Morris, page 72; and Vogue Knitting International, Fall 2001, “Cabling Without a Cable Needle,” by Meg Swansen, page 28.
© Sivia Harding 2003. All rights reserved. Visit Sivia’s website at: http://members.shaw.ca/siviaharding/index.html