Author Archive

Needle Felting: All the Rage for Bear Makers

Dec 27th, 2009 Posted in articles | Comments Off on Needle Felting: All the Rage for Bear Makers

By Nancy Cavanaugh from busyparentsonline.com
published with permission 2003

Bear makers all over the world have been talking about needle felting (also known as dry felting) lately. It is a simple and easy-to-learn process that takes a lump of wool and turns it into a piece of felt that can be used to make a multitude of projects.

According to teacher and bear maker Kathy Hays, needle felting “is the matting of wool fibers with a specially shaped needle. A medium to coarse fiber is placed on a foam mat, then needles are poked into the wool. The needles have tiny barbs in the shaft so as the needle goes into the fiber, it drags the fiber into the other fiber. This ‘tangles’ the fiber to keep it firm.”

Kathy, who lives in Seminole, FL with her husband and two children, is a traditional felter but took up needle felting four years ago. “I use soap and water to create felt. Needle felting had been floating through the very small felting population, so I decided I wanted to know what the chatter was!” she said.

Felting has been Kathy’s primary focus. “During the past year and a half, I have really focused on making hand-made felt dolls and defining my own work. I create because I enjoy the act of creating,” she commented.

Fellow bear maker and needle felter Bobbie Ripperger, who hails from Illinois, has been needle felting for about as long as Kathy. “I’ve been a bear maker of miniatures under three inches since 1990. I bought my first needles three years ago but didn’t do much with them due to lack of time for experimenting,” she said. “August ’02, some family health situations improved and gave me some breathing room, just as I discovered that after twelve years of intense, twenty-five-stitches-to-the-inch-sewing, arthritis was affecting my fingers too much to continue work as I’d known it. Not wanting to give up my minis, I picked up the needles in August and made my first ‘something.’ It wasn’t turning out right, so I put it aside and made a rabbit based on one of my fabric patterns. I went right into realistic animals, especially polar bears.”

Compared with other crafts, Bobbie, who will be 61 in the Fall, said, “I think I’ve finally found my true art niche!

“When designing a teddy bear or other soft-sculptured animal in fabric, all of the design thought process goes on before the scissors touch the fabric. The ‘skin’ is then cut, sewn and stuffed, like working from the outside inward. In needle felting, one starts from the inside – the basic shape or skeleton — and builds up the muscles and final outer surface one bit of wool at a time. There is no pattern and it’s almost impossible to get identical pieces. These are truly one-of-a-kind works,” she continued.

Needle felting is a relatively inexpensive craft to start. “The cost to begin needle felting is cheap. It takes a few needles — an assortment is good — ten dollars for a dozen. Small quantities of wool fiber, perhaps another ten dollars,” Kathy said. “Needle felting is for beginners, it is simple and easy to learn.”

Bobbie recommends a foam cushion as well. “In the beginning (you should use) a foam cushion about twelve inches by fifteen inches by three inches, to keep from jabbing your hand, leg or tabletop with these very sharp points,” she said.

Bobbie thinks it is definitely something the family can do. “All of my grandchildren have sewn, knitted, crocheted and even tried tatting. Our fifteen-year-old grandson took one of my felted bases (the ‘skeleton’ inside) for a polar bear and turned it into a goose. Our eleven-year-old granddaughter tried it briefly but she lives twelve hundred miles away, so hopefully this summer she’ll have a longer go at it.”

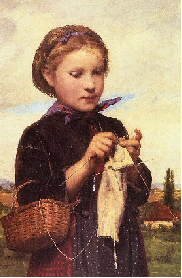
A six-inch Noggins created by Kathy Hays using needle felting. Students can create their own Noggins in her class for beginning needle felting at Crafty College.

Kathy had a few tips for beginners. “Patience! For most people, learning to handle wool is the biggest hurdle. I come from a fiber background and know how to handle the carded wool, or roving. I have seen numerous students struggle with fiber. They want to treat it as a fabric, when in fact it is very flyaway. The other problem is that students want to work too fast and look for instant gratification after about ten minutes. To get a piece to look good, it takes time.”

Bobbie’s tips: “Take your time. Practice, practice, practice. Use your imagination and let the wool become what it wants to be. If you start off making a teddy bear but it looks like a frog, go with frog!”

Kathy began teaching needle felting online three years ago. “I am a fiber artist, doll artist, felt maker and bear maker,” she said. “I teach online at Crafty College and really enjoy the venue. I do offer workshops locally and do travel outside my home state to teach doll making or felt making.”

Kathy feels that online classes in needle felting can be as good as in person. “I teach it online and in person. When good instructions are given, [along with] plenty of photos, you can easily learn.”

Bobbie has also designed a course for needle felting. “I’ve developed an online class for students to work at their own speed. The kits are bought and sent to the students, then I send the class lessons individually to them when they’re ready. The kits are eighteen dollars and the class costs twenty-five dollars.”

For more information about the kits, classes or supplies, you can contact Bobbie by e-mail at RKR4CDS@attbi.com. You can also purchase needle felting starter kits and project kits from many online stores.

Sample pattern: http://www.mielkesfarm.com/ladybug_dir.htm

Needle felting is a craft that requires the use of a very sharp needle. This craft is not recommended for children under the age of 12. It is recommended that beginners wear band-aids on their fingers when first learning how to do this craft to minimize possible injury to their hands.

Fiber Events & Festivals by Location

Dec 27th, 2009 Posted in events | Comments Off on Fiber Events & Festivals by Location

California

Dixon Lambtown USA Festival
P.O. Box 187
Dixon, CA 95620

Contact: staff
Fiber Festival: $Admission and parking for this family event are absolutely FREE!

Southern CA Handweavers and spinning festival

Torrance, CA
310-316-0910
Contact: Nancy Boerman
Show & Sale: $Features handweaving, spinning, dyeing exhibits, fashion show and supply vendors

Colorado

Convergence
TBA
Denver, CO 0
303-727-7944
Contact: hgaconvergence@weavespindye.org
Weaving gathering

Toe-up Sock Pattern

Dec 26th, 2009 Posted in Patterns | Comments Off on Toe-up Sock Pattern

by Wendy Johnson
editor’s note: knitting tow-up is a great way to ensure you’ve got enough yarn for the sock pattern. Divide your total yarn amount into two balls of yarn and knit your cuff to the desired length or until you run out of yarn. Having reserved the second ball, you know you’ve got enough to complete two socks.

Size: women’s medium (large)

Note: You can adjust this pattern for any size, any gauge. Measure around the ball of your foot. Multiply the number of inches you get by the number of stitches you get per inch when you do a gauge swatch. Then subtract 10% from that total. Fudge your number so it’s divisible by 4. This will make a nice, snug-fitting sock. This pattern is written using 60 stitches around for the sock, with changes for 64 stitches in parentheses.

Gauge: 8st/inch — I use US size 0 (2mm) needles with sock yarn. Your mileage may vary — check your gauge!

Start Your Toe
Using a provisional cast-on, cast on 30 (32) stitches (half the total circumference of the sock). I do my provisional cast-on using a crochet chain as follows:

Using waste yarn, crochet a chain that is several chain stitches longer than the number of knit stitches you need. Knit into the center loops of the back side of the chain, 30 (32) stitches. Purl back across stitches.

Row 1: Knit 29 (31) stitches. Move the working yarn as if to purl. Slip the last, unworked stitch from the left needle to the right needle. Turn your work.

Row 2: Slip the first, unworked, stitch from the left needle to the right needle. Purl the next stitch (you will have wrapped that first stitch around its base with the working yarn) and purl across to the last stitch. Move the working yarn as if to knit and slip last stitch. Turn.

Row 3: Slip the first stitch and knit across to the last stitch before the unworked stitch. Wrap and turn.

Row 4: Slip the first stitch and purl across to the stitch before the unworked stitch. Wrap and turn.

Repeat Rows 3 and 4 until 8 (9) of the toe stitches are wrapped and on left side, 14 (14) stitches are “live” in the middle, and 8 (9) are wrapped and on the right. At this stage, you should be ready to work a right side row. Your toe is half done.

Note: How many stitches you leave unworked in the middle depends on how wide you want your sock toe to be. If you want it a bit wider, do a couple fewer short rows. If you want it a bit narrower, do a couple more short rows.

Now you’ll work the second half of the toe:

Row 1: Knit across the 14 live stitches across to the first unworked, wrapped stitch. To work this stitch, pick up the wrap and knit it together with the stitch.

Wrap the next stitch (so that it now has two wraps) and turn.

Row 2: Slip the first (double-wrapped) stitch and purl across to the first unworked, wrapped stitch. Pick up the wrap and purl it together with the stitch. Wrap the next stitch and turn.

On subsequent rows you will pick up both wraps and knit or purl them together with the stitch.

Continue until you have worked all the stitches and you once again have 30 (32) “live” stitches.

When all 30 (32) stitches are once again “live,” divide those stitches over 2 needles. Unzip your provisional cast-on and divide those 30 (32) stitches over 2 more needles. On your first round, you may want to pick up an extra stitch or two between the “live” stitches and the stitches you’ve picked up from the cast-on, to close up any holes there might be there. On the next round remember to decrease back down to 15 (16) stitches per needle.

Note: Insert the tip of your needle into the stitch you knit up from the provisional cast-on before you unzip the chain – this will make it much easier to pick up the loops of the stitches. I usually insert my needle through four or five loops at a time, unzip the chain from them, do the next four or five loops, unzip, until I’ve picked them all up. When you unzip your provisional cast-on, you will have one less stitch than the total you picked up and knit. You can create that extra stitch at the end, by picking up the loop between the last stitch created with the provisional cast-on and the first live stitch.

You now have a total of 60 (64) stitches.

Work straight until the foot is about 2 inches shorter than the desired finished length. Place the 30 (32) instep stitches on one needle and put the 30 (32) heel stitches on another needle. work a short row heel on the 30 (32) heel stitches as for the toe, as follows.

Short Row Heel

Row 1: Knit 29 (31) stitches. Move the working yarn as if to purl. Slip the last, unworked stitch from the left needle to the right needle. Turn your work.

Row 2: Slip the first, unworked, stitch from the left needle to the right needle. Purl the next stitch (you will have wrapped that first stitch around its base with the working yarn) and purl across to the last stitch. Move the working yarn as if to knit and slip last stitch. Turn.

Row 3: Slip the first stitch and knit across to the last stitch before the unworked stitch. Wrap and turn.

Row 4: Slip the first stitch and purl across to the stitch before the unworked stitch. Wrap and turn.

Repeat Rows 3 and 4 until 8 (9) of the heel stitches are wrapped and on left side, 14 (14) stitches are “live” in the middle, and 8 (9) are wrapped and on the right. At this stage, you should be ready to work a right side row. Your heel is half done.

Note: How many stitches you leave unworked in the middle depends on how wide you want your sock heel to be. If you want it a bit wider, do a couple fewer short rows. If you want it a bit narrower, do a couple more short rows.

Now you’ll work the second half of the heel:

Row 1: Knit across the 14 live stitches across to the first unworked, wrapped stitch. To work this stitch, pick up the wrap and knit it together with the stitch.

Wrap the next stitch (so that it now has two wraps) and turn.

Row 2: Slip the first (double-wrapped) stitch and purl across to the first unworked, wrapped stitch. Pick up the wrap and purl it together with the stitch. Wrap the next stitch and turn.

On subsequent rows you will pick up both wraps and knit or purl them together with the stitch.

Continue until you have worked all the stitches and you once again have 30 (32) “live” stitches.

When you have all stitches live again, divide the stitches as you did for the toe. Once again, on your first round, you may want to pick up an extra stitch or two between the “live” stitches and the stitches you left on a needle for the instep, to close up any holes there might be there. On the next round remember to decrease back down to 15 (16) stitches per needle.

Work until the leg is the desired length to the ribbing, then work in ribbing to the desired finished length.

Note: Individuals with wide feet and/or heavier legs might find it difficult to get socks on and off. I sometimes increase stitches when I start the ribbing for the cuff. If I start out with 15 stitches per needle, I’ll increase to 16 stitches per needle, and do a k4 p4 rib. If I start out with 16 stitches per needle, I’ll increase to 18 stitches per needle, and do a k3 p3 rib. As you can see, it’s not an exact science – you can fudge wherever you feel the need to, to suit the sock’s recipient.

Cast off loosely.

Fiber Events & Festivals by Date

Dec 26th, 2009 Posted in events | Comments Off on Fiber Events & Festivals by Date

A full listing of knitting, spinning, weaving and other fiber events, workshops, retreats and festivals.

DATE LOCATION FEE/COMMENTS
Recurring Events
Second weekend in September East Central Minnesota Sheep & Wool Festival
Mora Civic Center, Kanabec County Fairgrounds
Mora, MN
320-679-2588
Contact: Pam Manthei (vendor info) Sharon Macy (class info)
classes available
Columbus Day Weekend Gunnison Fall Fair & Fiber Fest
Gunnison Multi-purpose building
Gunnison, CO
970-641-1260
Contact: CSU Extension Office
Livestock exhibits, wool & skein show
Third weekend in October New York Sheep & Wool Festival
Fairgrounds
Rhinebeck, NY
845-756-2323
Contact: Bob Davis
$7.00/adults $12.00/weekend pass children free
last week of march is our annual maple festival, our farm studio is also open thruout the year by appointment. Mountainspun Shetland Sheep farm & Fiber Arts Studio
Mountainspun Farm P O box 1002 jacksonville vt 05342-brochure & map handout during maple festival.
whitingham, VT
Contact: Bunny
Please email for more information
Maple fest offers sugar houses making syrup, visit many and taste! famous breakfast , craft & sugar house & farm tours! river winery open house also!
Annually, first weekend of April AlpacaPalooza 2004
Evergreen State Fairgrounds
Monroe, WA
Contact: April Works
$2 or $1 with canned food donation
Two days of peace, love and livestock featuring hundreds of alpacas, halter and fleece show, a fashion show, fiber arts, educational seminars and demonstrations and much, much more.
Starting next year (2005) the event will be annually on the fourth Saturday in April. Up until now it has just been any ole’ Saturday in April. Stephenson County Fibre Art Fair
Jane Addams Community Center
Cedarville, IL
815-232-8419
Contact: Suzy Beggin
$2 Admission
Over 20 vendors with raw and washed fleeces, roving, batts, yarns, books, soaps, baskets, supplies. Plus workshops and demonstrations.
First weekend in May Maryland Sheep & Wool Festival
Howard County Fairgrounds – West Friendship, MD
Glenwood, MD
410.531.3647
Contact: Gwen Handler
No charge
sheep shearing, sheep shows, wool crafts, spinning, weaving, sheepdogs, gourmet lamb cooking (and eating), demonstrations and workshops to teach both kids and adults.
No pets
Annually, Mother’s Day weekend Shepherd’s Harvest Sheep and Wool Festival
Washington County Fairgrounds
Lake Elmos, MN
763-389-5311
Contact: Susan Paul
Free admission, free parking – fees for classes
Sheep shearing and displays, sheep and bunny wool shows, vendors, classes – held in conjunction with Llama Magic
8th Annual wool event, held the first Saturday after the 15th of May. Fiber thing
Shawano County Fair Grounds
Shawano, WI
715-526-9034
Contact: Kitty Brady
Free Admission
Fiber related activities,classes,demonstrations, vendors, sheep shearing, fiber bearing animals, fleece & skein competitions.
Memorial Day weekend Heart of America Sheep Show and Fiber Fest
Vernon County Fairgrounds
Nevada, MO
Contact:
Admission – Free to the general public
free parking available. On-site camping for tents and 110 hookups only. Restrooms, showers & electrical hookups are available. Campsites with 110 electrical hookups for campers, trailers and vehicles $15 per night; campsites with no electrical hookups $
every other year(even years) SW Montana Sheep & Wool Festival

Dillon, MT
Contact:

free
vendors, lifestock show, work shops, seminars, very friendly and family oriented event.
every other year(even years) SW Montana Sheep & Wool Festival

Dillon, MT
Contact:

free
vendors, lifestock show, work shops, seminars, very friendly and family oriented event.
Second weekend in June Estes Park Wool Market
Stanley Park Fairgrounds
Estes Park, CO
970-586-6104
Contact:
Free, $2 parking
Workshop dates: 06/10/6/11/2004, pre-registeration required. Exhibits, demonstrations, competitions and vendor booths, children’s tent
Third weekend in June Black Sheep Gathering
Lane County Fairgrounds
Eugene, OR
Contact:
30th anniversary celebration,
Annually-Second weekend in September Wisconsin Sheep & Wool Festival-WI SpinIn
Jefferson Fair Park
Jefferson, WI
608-868-2505
Contact: Jill Alf
$5.00/day $10.00 weekend pass
Fiber Art Classes, Sheep shows and classes,stock dog trials and border collie shows, fleece show and sale
Giant Country Store
annually Oregon Flock and Fiber Festival
Clackamas County Fairgrounds
Canby, OR
503.628.1205
Contact: Brandy Chastain
free, free parking
vendors, livestock show, work shop, seminars, contests, cook-off, lots of stuff for the kids, very nice historic facilty, great atmosphere and family event
Annual event always held the last weekend of September. THE Gathering
The Academy of Spinsters
Encampment, WY
307-327-5568
Contact: Carol Lee
No fees, a free weekend
Every year we hold this free event. Come on out!
Always the 4th weekend in September Harvest Sheep & Fiber Festival
Salem County Fairgrounds
Pilesgrove Township, NJ
Contact:
NO PETS – NO DOGS
First weekend of October The Wool Festival at Taos
Kit Carson Park, downtown Taos
Taos, NM
888-909-9665
Contact: Coralie
FREE entrance
Vendors, contests, demos, fashions, workshops (begin 9/27), auctions, music, and food are yours in Taos, NM.
Second weekend of October each year Saratoga County Fiber Tour
Saratoga County Farms
, NY
518-893-2015
Contact: Kathy Bourgeois
free
This event is a driving tour of several Saratoga County Farms with events, prizes and items for sale
Annually, second weekend in November. Kid ‘N Ewe and Llamas Too
Kendall County Fairgrounds
Boerne, TX
(361) 729-41
Contact: Grady Ingle
Free Admission
This fiber event features vendors, competitions, workshops, demonstrations, and silent auction sponsored by Fiber Producers of Texas, Inc., Texas Cashmere Association, and the South Central Llama Association.
Annually on weekend closest to Veterans Day Wool Festival of the Southwest
McGee Park Convention Center and Fairgrounds
Farmington, NM
505-325-2837
Contact: Lyn Brown
This year’s festival will add fiber animal show, fashion show and sheep dog trial (demos)
Annually, first Sunday in May Stitch n’ Soak
Ouray Community Center
Ouray, CO
970-325-4071
Contact: Caroline Stoufer
Vendor Fees to be determined
We’ll have vendors of wonderful fibers, classes, demonstrations in a town with incomparable scenery and natural hot springs!

Wraps per inch method

Dec 26th, 2009 Posted in articles | Comments Off on Wraps per inch method

How to buy enough yarn using the Wraps Per Inch method

Ahhh, you’re looking at a fine skein of yarn, and don’t yet have a pattern or design. It’s on sale, it’s calling your name. You’ve got to buy it. How much to buy? Here is a simple method of determining how many yards of yarn you’ll need using the Wraps Per Inch (WPI) method:

wraps per inchWrap your yarn around a pencil, or ruler or any other similar object and count the number of wraps per inch. You can even make a tool with the inch marks indicated on the dowel but a ruler works great too since it’s already marked off. If you’re worried about pulling apart a skein you haven’t purchased yet, just lift up an inch worth of strands away from the skein without disturbing the hold. In this photo I wrapped around a pencil and measured against a ruler. There are 12 wraps over one inch so my WPI is “12”.

Wrap somoothly, with the yarn touching but not too tight. When measuring thicker yarns it’s best to do the wrapping over several inches and then divide (i.e., wrap over 3 inches and divide by 3). Once you’ve wrapped, calculate your number of wraps per inch (or WPI)

Refer to this handy chart A (or print and keep in your wallet!). This chart is for an average adult pullover sweater.

You’ll notice that the yardage is equal to the WPI X100 (12 wpi for worsted weight X 100 is 1200 yards you’ll need to buy). So if you can memorize this formula you can buy yarn anywhere, anytime.

To adjust the yardage for other sizes, add or subtract the % according to chart B

*See this link for determining gauge

Chart A: Yardage using WPI

Type
WPI
*Gauge in stockinette
(stiches per inch)
Needle size
Yardage
med sweater 36-38" plus 2" ease
lace
18+
8+
#00, 1, 2
1800-2200
fingering
16
6-8
#2, 3, 4
1600-1900
sport
14
5-6
#4, 5, 6
1400-1600
worsted
12
4 1/2-5
#7, 8, 9
1200-1400
bulky
10
3 1/2-4
#10, 10 1/2, 11
1000-1200
super bulky
8
2-3
13, 15, 16
800-1000

Chart B: Calculating other sizes

Size chest measurement Add or subtract
Child 25" or less subtract 30%
Ex. Small 28"-30" subtract 20%
Small 32"-34" subtract 10%
Medium follow chart above  
Large 40"-42" add 10%
Extra Lg. 44"-46" add 20%

Keep in mind for other sweater styles you’ll need to add or subtract. Here is a guideline:
Add 10% for cable designs or other similar textures
Add 30-50% of total yarn needed for fair isle or other designs requiring a yarn carry to the inside.

Free Knitting Patterns

Dec 26th, 2009 Posted in Patterns | Comments Off on Free Knitting Patterns

free knitting patterns for socks, babies, children, scarves, shawls, hats, sweaters and more

Socks

Toe-Up Socks

Baby and Children

Simple Baby Hat
Easy Children’s Mittens

Scarves & Shawls

Easy Laceweight Leaf Scarf

Other Themes

American flag patterns (hat, flag, socks)

Dyeing Yarn With Kool-Aid

Dec 26th, 2009 Posted in articles | Comments Off on Dyeing Yarn With Kool-Aid

Kool-aid is a safe, easy and fun way to dye wool yarn. It requires no specialized equipment, and is safe enough to do with small children. Since it’s actually food dye, you can even use your kitchen utensils without fear of contamination.

Choosing and Preparing the Yarn

To begin, you’ll need a quantity of wool yarn. One of the great things about wool (and other animal fibers) is that it takes dye so easily and so beautifully. It’s really pretty hard to get bad results. Plant fibers such as cotton can be more difficult to dye, requiring a dye solution with a base pH, so these instructions are for wool yarn only.
[adrotate group=”1″]
The yarn you choose can be thick or thin, natural or dyed. If you choose a previously dyed yarn, you should select one in a fairly light shade, since you want the Kool-aid color to show up. Overdyes often result in a more subtle, sophisticated color effect. For example, you could place light blue yarn into a yellow dye bath, and the resulting green will be different than if you simply placed natural white yarn in a green dye bath.

You should choose enough yarn to complete the project you have in mind, since it will be fairly difficult to duplicate the results exactly. If you think you might want to repeat a color in the future, then you’ll need to make notes regarding exact quantities, times, and temperatures of everything you do.

If your yarn comes in a center-pull skein, you’ll need to rewind it into a twisted skein or big loop. This allows the dye to come into contact will all parts of the yarn. (It’s amazing how protected the yarn at the center of a ball can be!) You’ll be handling the yarn a fair amount at rinse time, so tie the skein in several places to avoid having a snarled mess when you’re done.

Pre-wet the yarn by soaking it in cool water for about 20 minutes, then squeezing it out. This allows for quicker, more even dye penetration. If you want to try for a mottled look, you can skip this step and start with dry yarn, but it will take longer for the dye to saturate the wool.

Choosing and Mixing the Dye

You’ll also need some packets of unsweetened Kool-aid or other brand drink mix. The colors are fairly predictable – for red, try strawberry or cherry. For purple or blue, try grape or blue raspberry. For orange, try orange or tangerine. For green, try lemon-lime. For yellow, try lemonade. For other colors, try mixing different flavors together. Feel free to experiment with whatever flavors you can find – that’s part of the fun. Some colors are harder to come by than others, and you may have to substitute or supplement with the kind of food coloring you can buy in the spice section at the market.
[asa]B001IZLULE[/asa]
How many packets you need is largely a function of how much yarn you want to dye and how dark you want to dye it. For a sock or scarf-size amount of wool and a light to medium color, one or two packets should suffice. It’s difficult to give exact formulas for the dyes, since so many variables besides amount of dye can affect the final result. The entire process is subject to a fair amount of trial-and-error, but that’s where the fun is.

Remember that in almost all cases, you will be mixing the flavors in a much stronger concentration than you would to drink them. If you still can’t get a color you like, try adding a few drops of food coloring. In general, when you mix the dye you want to have enough liquid to cover the yarn. If the yarn isn’t completely immersed, the results will be mottled (a nice look, too), and having an excessive amount of liquid will dilute the color and waste the dye.

Finally, for best results, add about ¼ cup of white distilled vinegar per quart of water to make the pH of the solution acidic. This step isn’t necessary, but wool accepts dye better under acidic conditions.

Baggie Method

So, let’s get started. I like to do this in my kitchen, but I do put down a layer of newspaper, plastic, paper towels, or whatever on the counter to minimize messes. Kool-aid may also stain fingers, mouths, and clothing, so wear clothes you don’t care about.

The easiest, most child-friendly method is to empty a packet of Kool-aid into a large zip lock baggie, add about a quart of cold water, put in the yarn (enough for a scarf or socks), and seal the bag. You can then squeeze it around until it’s well mixed and place it in the sun for several hours or all day if possible. The reason for placing it in the sun is that heat will help to set the dye, but it’s not so hot that little fingers will get burned.

Allow the bag to cool as much as possible before taking the yarn out and rinsing it in cool water until the water runs clear. The reason for this is to avoid temperature shocking the yarn, which could result in some unwanted felting or shrinkage. Squeeze out the excess water and hang the yarn up to dry, out of direct sunlight if possible. This method will result in a single-color yarn, possibly with some variation in color saturation.

If you’re not happy with the color, you can re-dye it with the same or another color, or use the dip-dye technique described below.

Stovetop Method

Cooking the mixture on the stovetop will set the dye better and more quickly than letting the sun cook it in a baggie. Simply place the dye mixture in a saucepan and add the yarn before turning on the heat. Heat the mixture to a gentle boil for 5 to 10 minutes, squeezing the yarn with a spoon or other implement to saturate it with dye. Be careful not to slosh the hot liquid on yourself.

Allow the mixture to cool to room temperature before removing the yarn and rinsing with cool water until it runs clear. As before, hang the yarn to dry.

Dip-Dye Method

The dip-dye method will allow you use two or more colors on the yarn. Keep in mind when you select your colors that they will overlap and form a third color for a short area. So, if you choose blue and yellow, you will also have a section of green where these two dyes blend.

Use a separate bowl or jar of the same height for each dye color. Add the dye, place the jars right next to each other, and put half the yarn in each jar. If the section of yarn that’s out of the dye remains uncolored, you can “rotate” it part way through the process. Allow the yarn to sit in the dye for several hours, or until the dye is “exhausted.” The dye bath is exhausted if all the dye adheres to the yarn, leaving virtually clear water behind.

If you like the color after only a short time, by all means remove the yarn from the dye and finish processing it. Remember that some of the color will rinse out, and the remaining color will probably dry a shade or two lighter.

After the dye bath, you can simply rinse the yarn in cool water and dry as before, or you can “cook” it to further set the color. To do this, place the yarn in a baking pan in the oven at 200 degrees for about 10 minutes. After removing the yarn from the oven, allow it to cool to room temperature before rinsing in cool water and drying.

References

Bourgeois, A. and E. Bourgeois. Fair Isle Sweaters Simplified. Bothell, WA: Martingale & Company, 2000. Has brief instructions and examples of Kool-aid dyeing on page 51.

Brown, R. The Weaving, Spinning, and Dyeing Book. New York: Alfred A. Knopf, 1978. Has general instructions on dyeing techniques.

Potter, C. and A. Xenakis. Handpaint Country. Sioux Falls, SD: XRX, Inc., 2002. Has general instructions on dyeing techniques.

Vickrey, A.E. The Art of Feltmaking: Basic Techniques for Making Jewelry, Miniatures, Dolls, Buttons, Wearables, Puppets, Masks, and Fine Art Pieces. New York: Watson-Guptill Publications, 1997. Has brief instructions for Kool-aid dyeing of both yarn and fleece on p. 22.

Little Leaf Scarf

Dec 26th, 2009 Posted in Patterns | Comments Off on Little Leaf Scarf

This effective, easy-to-knit lace scarf is a good beginner lace knitting project. This leaf scarf pattern is an original design by Sivia Harding.

Scarf dimensions: 10.5″ wide x 41″ long

Materials:
Laceweight/fingering weight yarn – approximately 200 yds
3.75 mm circular needle
tapestry needle
stitch markers

Gauge:
5 sts and 7 rows/in. (blocked) over lace pattern

Little Leaf Lace Pattern:
Row 1 (and all WS rows): Purl
Row 2: K1, *k2tog, yo, k3, yo, ssk, k1. Repeat from * across.
Row 4: K3, *yo, sl 1 – k2tog – psso, yo, k5. Repeat from * across, ending last repeat k3.
Repeat these 4 rows for pattern.

Notes:
1. Start each row: slip 1 purlwise with yarn in front, k2.
2. End each row: k3.

Instructions:
Cast on 47 sts. Knit 5 rows (garter stitch).
Row 6 (and all WS rows): K3, place marker, purl across, pm, k3
Row 7 (and all RS rows): Slip 1 purlwise with yarn in front, k2, pass marker, knit across in pattern, pm, k3.
Repeat rows 1 – 4 of pattern 64 times (256 rows).
Knit 5 rows (garter stitch).
Bind off loosely. Weave in ends and block scarf.

Child’s Mitten

Dec 26th, 2009 Posted in Patterns | Comments Off on Child’s Mitten

A knitting pattern for children’s mittens adapted by Sivia Harding. Woolfestival is happy to bring you this free pattern for knitting simple children’s striped mittens. This child’s mitten knitting pattern is based on Elizabeth Zimmerman’s adult mitten pattern and has been adapted for children’s mittens with stripes by Sivia Harding.

Gauge:
5 sts= 1″ for a mitten measuring approx. 3-1/2″ from side to side and 6″ from top to bottom

Materials:
Worsted-weight wool in 2 colors – sm. amount
3.25 mm double-pointed needles, or size to obtain gauge
stitch holder or thread
tapestry needle

Instructions:
Cast on 28 stitches and distribute on 3 double-pointed needles.

For next 8 rounds, work K3, P1 rib

Next round – decrease, working (K2, SSK) 7 times around (21 sts)

For next 3 rounds, knit even.

Next round – increase, working (K3, M1) 7 times around (28 sts)

For next 9 rounds, knit even. (Note: If stripe is desired, work 7 rounds in MC, then change to CC and work 2 more rounds)

Next row – start thumb: For right mitten, knit 1 st, put next 5 sts on holder or thread, cast on 5 sts using backwards loop cast on, then continue knitting around. For left mitten, knit 22 sts, put next 5 sts on holder or thread, cast on 5 sts using backwards loop cast on, then finish the round by knitting 1 st.

Knit 14 rounds even (Note: for striped mitten, continue knitting w/ CC for 7 rounds, then change to MC for 7 more rounds)

Next round – decrease, working (SSK, K3, K2tog) 4 times around. (20 sts)

Next round – knit even

Next round – decrease, working (SSK, K1, K2tog) 4 times around (12 sts)

Next round – decrease, working (SSK, K1) 4 times around (8 sts)

Pull yarn through remaining sts and fasten.

Thumb:

Put 5 held sts on needle and knit across. (If working stripe, use CC.)

Pick up one stitch on each side and 6 sts from cast-on sts on top, giving you 13 picked up sts for thumb.

Distribute on 3 needles.

Knit 9 rounds even.

Next round – decrease, working (K1, SSK) 3 times and (SSK) 2 times. (8 sts)

Pull yarn through remaining sts and fasten.

If necessary, close hole on side of thumb with yarn tail. Weave in ends.

Simple Baby Hat

Dec 21st, 2009 Posted in Patterns | Comments Off on Simple Baby Hat

Simple Baby Hat Top ViewThis simple baby hat pattern is easy for even for beginners. Like our other free knitting patterns for babies, this easy baby hat pattern uses a combination of the double cast on stitch, the garter stitch, the stocking stitch and a perfect k2tog bind off. You will quickly learn why this is considered one of the easiest crochet baby hat knitting patterns.

Info For Beginners
K=Knit (ie, K7=Knit 7 stitches)
General Info on how to Knit and follow a pattern, is available here.
The Double method of casting on, which is neat and gives you an already-knitted row, is shown here!

Sizes
Small (12-18 months) to fit head 17 inches circumference
Medium (3-5 yrs) to fit head 19 inches circumference
Large (6-8 yrs) to fit head 21 inches circumference

Materials
Set of US size 6 (or 4mm) double-pointed needles
worsted weight yarn

Gauge
4 1/2 stitches/inch
6 rows/inch

Simple Baby Hat Side ViewThe Basic Hat
Instructions are for the smallest size, with larger 2 in parentheses. To alter hat to account for different gauge or size, just
remember to keep the number of initial stitches divisible by 8. (I’ve used 72; you may use 80, 88, etc)

Cast on 72 (80, 88) sts and join to form a round.
Knit 6 (8, 8) rows of garter stitch
Knit stocking stitch until you reach 2 1/4 (2 1/2, 2 1/2) inches in from bottom edge of hat

Decrease for top
[K7 K2tog] repeat to end of round. Knit 2 rounds
[K6 K2tog] repeat to end of round. Knit 2 rounds
[K5 K2tog] repeat to end of round. Knit 2 rounds
[K4 K2tog] repeat to end of round
[K3 K2tog] repeat to end of round
[K2 K2tog] repeat to end of round
[K1 K2tog] repeat to end of round

[K2tog] repeat, until only 1 stitch remains
Break yarn, thread through stitch, and fasten off neatly.
Sew in all loose ends.

Optional Touches
The red “row” was added afterwards with a loose crochet: one crochet stitch for each knit stitch.
As an obvious alternative, one could knit it in, instead, as the first stocking stitch row. One could also cross-stitch the row. Also, I ended up crocheting ear-flaps on it, for warmth and to keep it on the head!