Archive for the articles Category

What Knitting Machines Can Do

Dec 27th, 2009 Posted in articles | Comments Off on What Knitting Machines Can Do

by Sonja Kathleen

Automatic Stitch Techniques

Modern knitting machines can perform a variety of interesting stitch techniques without a ribber or garter carriage. These include fair isle, tuck, skip, normal lace, fine lace, thread lace, weaving, plating, and intarsia. Some of these are identical to their hand knitting counterparts; others are unique to knitting machines.

Each type of stitch is accomplished by using one of the four positions for each needle in conjunction with the different cam settings on the knit carriage. The four needle positions are non-working, working, upper working, and holding. Most of the stitch functions are fully automatic, meaning the machine places selected needles in either the working or upper working position with each pass of the carriage, according to the design pattern. All the knitter needs to do is move the carriage back and forth to knit the fabric. These stitch functions are all exclusive of one another; that is to say, they cannot be combined in any one row (i.e. you can’t knit fair isle lace, although you can knit a fair isle body with lace sleeves)

Fair Isle

Fair isle refers to stranded knitting using two colors, just like in hand knitting. The main color knits on needles in working position, and the alternate color knits on needles in upper working position. Although only two colors can be used in any given row, these can be changed from row to row, giving you more options. As in hand knitting, the knitter will want to choose a design that minimizes the floats on the back of the fabric. However, the machine virtually eliminates tension problems with the yarn carried behind.

Tuck Stitch

Tuck stitch doesn’t really have a hand knitted equivalent that I’m aware of. In tuck stitch, the needles in working position knit normally. The needles in upper working position don’t knit, but an extra loop of yarn is laid over them with each pass of the carriage. When these needles are returned to working position, all the loops on the needle knit in a single stitch, resulting in a textured fabric. Tuck stitch uses only one strand of yarn per row, although it can be changed on any row for some interesting color effects.

Skip Stitch

Skip stitch is the machine knitting equivalent of slipping instead of knitting a stitch. In hand knitting, it’s also used to do mosaic knitting. As in tuck stitch, the needles in working position knit and the needles in upper working position don’t. However, no extra loops of yarn are laid over the needles in upper working position, so when the needle finally knits, it’s a single, longer stitch. As with tuck stitch, the yarn can be changed on any row to produce mosaic effects.

Normal Lace

Normal lace is the machine equivalent of traditional hand knitted lace. Also called “transfer lace”, it requires the use of a special lace carriage in addition to the knitting carriage. When the lace carriage is passed over the needles, stitches in upper working position are transferred or moved to adjacent needles. Then, when the knit carriage is passed over the bed, needles with multiple stitches knit normally (the equivalent of “knit 2 together”), and needles with no stitch are cast on (the equivalent of a “yarn over”), creating the characteristic holes.

Fine Lace

Fine lace is a textured fabric that is probably most similar to the effect you get when you twist stitches in hand knitting. It’s worked in exactly the same way as normal lace. However, when a transfer is made, the stitch remains on the original needle while also being stretched onto an adjacent needle. Thus, when the knit carriage is operated, there are “knit 2 togethers” but no “yarn overs” since no needles are empty.

Thread Lace

Also called “punch lace”, thread lace is essentially fair isle done with a regular yarn and a matching thread. Because the thread is so much thinner, it barely shows, making it appear that the fabric has lace holes in it.

Weaving

Weaving is actually a knitted technique using a backing yarn and a weaving yarn. The machine automatically places needles in either the working or upper working position according to the design pattern. The knitter manually places the weaving yarn along the needles in upper working position, and then passes the knit carriage over them. The backing yarn knits normally, but catches in the weaving thread on those needles, forming floats of different lengths on the surface of the fabric. The floats appear as a woven pattern on the wrong side of the fabric.

Plating

Plating is normal stockinette stitch done with two separate yarns. The main yarn knits normally, and the alternate yarn knits behind it simultaneously. This produces a “lined” knit fabric, which is useful if your main yarn is scratchy. The alternate yarn shows through a little bit, giving subtle color variations.

Manual Techniques

Some of the stitch techniques are completely manual, meaning that the machine doesn’t select the needles for you. The knitter must look at a graphed design, select the needles after each pass of the carriage, and perform the manual operation before passing the carriage again. These techniques include intarsia, cables, and hand-manipulated stitches.

Intarsia

Intarsia is the most labor-intensive of the manual techniques. The knitter places each color yarn on the appropriate needles before passing a special intarsia carriage over them. The yarns are threaded through special weights that hang down from the needle bed to help maintain good tension. On some machines, the knit carriage has a special setting so a separate intarsia carriage is not needed.

Cables

Cables can be formed by manually transferring stitches to other needles on the appropriate row. Although a complicated cable pattern can be labor intensive, cables usually work up quickly since the transfer is made on a small percentage of the rows. It can be difficult to work cables wider than 3 x 3, however, since the fabric doesn’t usually have as much give as hand knitting.

Hand Manipulated Stitches

Hand manipulated stitches include twisting, wrapping, weaving, lifting, rehanging and transferring stitches to create textured fabrics. These techniques result in surface embellishments, puckers, relief patterns, gathers, ruching, bobbles, popcorn, pintucks, fringes, and trims, even beading. There is almost no limit to the variety a knitter can achieve.

Pattern Variations

Electronic knitting machines may also include pattern variation buttons that allow the knitter to change a design that’s already been input, either by the knitter or pre-programmed. These include reverse, mirror image, upside down, reflection (vertical mirror image), double width, double length, rotation, negative, multi-color rib (jacquard), and single motif. Using double width and double length together will automatically make your design four times larger without having to re-enter it.
How Knitting Machines Work

Dec 27th, 2009 Posted in articles | Comments Off on How Knitting Machines Work

by Sonja Kathleen

Hand Versus Machine Knitting

When you hand knit something, let’s say on two needles, you cast on all of your stitches and start knitting. The needles hold all the open stitches while you work on the one closest to the tips. When you get to the end of the row, you turn and work back. If you’re working in stockinette stitch, this means you knit one row, then purl one row, and so on.

The key parts of the knitting machine are a needle bed with up to 200 needles, and a knit carriage. The needles look like tiny latch hooks, and can be placed in 4 different positions: non-working, working, upper working, and hold. The knit carriage is a fairly flat piece of metal and plastic with a handle and lots of switches. When you cast on, a stitch is placed in each working needle, and when you run the knit carriage over the needles, each one knits. When you get to the end of the row, you don’t turn the work-you just run the carriage back the other way. This means you produce stockinette stitch without ever turning the work or making a purl stitch. The carriage and needles just make the knit stitch over and over again.

With hand knitting, you can knit in the round or flat. With few exceptions, knitting machines are used to knit flat pattern pieces, which are then assembled as in hand knitting. The difference is that with hand knitting, the knitting takes longer than the finishing, but with machine knitting it’s just the opposite-the finishing takes longer.

Although the machine can perform several stitch techniques automatically, the knitter must perform all shaping (as in hand knitting) by increasing or decreasing the number of needles in use at the appropriate time. To make a garment piece, such as a sleeve, the knitter places the correct number of needles into working position and casts on. Each time the knit carriage is passed over these needles, one row is knitted. The gauge has been worked out beforehand, so the knitter knows how many stitches and rows to knit for each piece. The work hangs straight down from the machine in front, with the reverse side facing the knitter, and grows towards the floor.

To shape the pattern piece, the knitter can use several different methods to increase or decrease. To increase the sleeve from the cuff, the knitter moves additional needles to working position at regular intervals. To shape the sleeve cap, the knitter decreases by moving the stitches to be decreased to adjacent working needles and placing the empty needles into non-working position before moving the knit carriage. It’s even possible to short row by placing needles into the hold position. These needles don’t knit when the carriage passes over them. Finally, the work is either cast off or scrapped off on waste yarn, which is used to keep open stitches from unraveling.

Purl Stitches

The advantage of machine knitting is, obviously, that you can produce stitches very quickly. The disadvantage is that you lose flexibility with regard to the types of stitches you can make. When you knit by hand, you can place knit or purl stitches wherever you like and without much extra effort, to produce ribbing, garter stitch, or textured stitches such as moss or seed. The machine simply can’t do this automatically without extra attachments. It’s possible to form purl stitches by hand on the machine, but this is usually not practical because there tend to be so many. You might as well knit the whole thing by hand.

There are two ways to form purl stitches automatically on the knitting machine-the ribber and the garter carriage (see Part IV). The ribber is a separate needle bed that attaches to the knitting machine such that the two beds are closely positioned, facing each other at an angle. Stitches on the main bed are knit and stitches on the ribber bed are purl. That’s great for a variety of ribbings and even several all-over fabrics such as fisherman’s or English rib. However, it’s not practical for fabrics where the position of the purl stitch changes from row to row, as in textured stitches. For these types of fabrics, you need a garter carriage, and garter carriages only work on standard gauge machines.

The garter carriage can produce a knit or a purl stitch at any position in any row. However, it moves automatically and at a much slower pace than you can move the knit carriage, so these fabrics can take much longer to produce. The good news is that you can set it to knit and leave the room. Garter carriages can be a little persnickety, and I find that conditions need to be just right or you won’t get good (or any) results.

Supporting Parts

Quality knitting machines include several components that make knitting much easier. These include the tension mast, metal needle bed, gate posts, fully functional knit carriage, row counter, extension rails and specialized tools. Hobby machines may not have some of these parts.

Tension Mast

The tension mast is a tall rod with dials and funny-looking wires attached to it, that stands up from the back of the machine. The yarn is threaded through it before being threaded into the knit carriage. Although it looks complicated, it helps to keep the yarn tension correct, and prevents loops from forming at the sides of the knitting. It has places for two different yarns, and helps keep them separate for stranded knitting.

Metal Needle Bed with Gate Posts

The needle bed holds the needles in place so they can slide back and forth while working. Metal needle beds are obviously more durable than plastic ones. A needle position indicator helps the knitter keep track of how many needles are selected. Gate posts are stationary metal pins between the needles that help the stitches to form and knit correctly.

Knit Carriage

The knit carriage is a key component for performing a wide variety of functions.
It has two yarn feeders, and a tension dial to control the stitch size. It has a variety of buttons, switches and levers that control the channels, or cams, on the underside of the carriage. The needles pass through these channels as the carriage is moved, which cause them to behave differently depending on which position they’re in and which cams have been selected. This is necessary to perform any of the stitch techniques (see Part III) or the machine equivalent of short row shaping, known as “holding.”

Row Counter

The row counter keeps track of how many rows have been knitted. On fully electronic machines, it also keeps track of the design and pattern rows.

Extension Rails

Extension rails give lace and knit carriages a place to “rest” off the needle bed when knitting lace or wide pieces, so they don’t fall off the ends of the needle bed when you need a little extra working room.

Specialized Tools

Specialized hand tools are used for a variety of knitting operations such as needle selection, cast on and cast off, stitch transfer, yarn conditioning, and stitch formation. These include cast-on combs, claw weights, transfer tools in various configurations, latchet tools, crochet hooks, needle pushers, cast-on thread, yarn wax and tapestry needles. Other tools are included to help maintain the machine, including oil and a hand brush. Most machine knitters purchase additional tools such as garter bars, long cleaning brushes, and ball winders.

Next Installment: What knitting machines can do (3/4)

What You Should Know Before Buying a Knitting Machine

Dec 27th, 2009 Posted in articles | Comments Off on What You Should Know Before Buying a Knitting Machine

by Sonja Kathleen

I think that knitting machines are just the thing for slow, but goal-oriented, hand knitters. Some hand knitters are quick, but not me. I didn’t even hold the yarn right for the first 20 years. Don’t get me wrong-I love hand knitting. But I was always thinking ahead to when my project would be finished and how great it would look, not to mention what I would start on next. My enthusiasm for a project usually turned to boredom before it was finished. Even worse, the disappointment I felt when a project didn’t fit right made me feel that I had wasted a huge amount of time.

One day, a light bulb went off in my head. I had seen a knitting machine demonstration at a craft show several years earlier but hadn’t thought about it since. With a new baby, no time, and lots of knitting I wanted to do, surely this was the answer! I thought I would be able to use a knitting machine to make any hand-knitting pattern. I set out to find a knitting machine, confident that it would be just a quicker version of my own hands. Wrong! And right, just not in the way that I thought.

The dealer I found was helpful, but I didn’t know what questions to ask, and since my only contact with her was over the phone it was difficult for her to explain knitting machines without demonstrating. What follows are some of the things I’ve learned since becoming a machine knitter, things I wish I had known before I started. Part I covers types and brands of machine, Part II explains how they work, Part III describes what they can do, and Part IV lists the various accessories.

Now, I’m no expert and this is certainly not a comprehensive article. It’s not an instruction manual. Just think of it as one knitter’s observations. I can’t tell you whether machine knitting is right for you–I can only try to explain what machine knitting is before you buy a machine and learn to use it.

PART I: THE CHOICES

Types and Brands

Knitting machines can perform a wide range of stitch techniques and functions. However, not every brand or model will have all of the features, so it’s important to know what you want before you select one.

There are two main types of modern home knitting machine – Passap and the “Japanese” machines. The Passap brand used a different system for making the knit stitches, and is no longer being produced. I have only used Brother knitting machines, so this discussion is geared specifically to Brother, and generally to the Japanese machines. In addition, I have excluded hobby machines, such as the Bond Incredible Sweater Machine, from this discussion simply because I have never seen or used one. However, my understanding is that these machines work in a similar fashion but have fewer features than the home knitting machines.

There are several different brands of Japanese machine, though all are similar and work the same way. The main differences are in what the different switches and levers are called, and where they are positioned. The only Japanese-type machine I know of that is currently being manufactured is the Silver-Reed, although I believe there is also a new brand from China. Most of the brands are no longer produced, including Brother, Studio/Singer, Knitmaster, Knitking, Toyota, White/Superba, and Artisan, although many of these machines are still available used.

Used machines can be an excellent value, especially since any new machine tends to be expensive. Like all hobbies and crafts, machine knitting has surges of popularity, but when demand wanes the companies no longer find it profitable to produce machines. I hope that with the current popularity of hand knitting, machine knitting will soon follow once again.

Selecting a Gauge

Probably the biggest dilemma you’ll face when choosing a knitting machine is not what brand to buy, but what gauge. Gauge refers to the size of the needles and how closely they are spaced on the needle bed, which has a direct relationship to the size of the yarn they can knit. No machine can knit every yarn, although each is designed to handle a range of yarns within the spectrum from super-fine to bulky.

Machine specifications will state the number of needles and give the needle pitch in mm; however, this is NOT the same as the hand knitting needle size. It’s best to go by the description of the machine gauge, of which there are three: standard, bulky, and fine.

Standard gauge machines are the most common. They have 200 needles with a needle pitch of 4.5 mm. They knit a wide variety of yarns, everything from lace weight to sport weight. This makes for beautiful knitted clothing and sweaters, but not the typical heavy ski sweater.

Bulky gauge machines have 114 needles with a needle pitch of 9 mm. They are designed to handle worsted weight yarns to create sweaters that look like hand knits, but can also be used with sport weight or bulky yarns. This is your heavy ski sweater.

Fine gauge machines handle the finest of yarns, from mere threads to lace weight yarns. They’re used to produce very fine knit fabrics that are typically seen only in manufactured clothing.

A fourth gauge does exist, known as “mid-gauge”. These machines were designed to combine the best of the standard and bulky machines, meaning they could knit sport or worsted for greatest variety. However, many of the mid-gauge machines are of inferior quality, with plastic needle beds and fewer stitch functions, so I regard them as hobby machines.

Many dealers will tell you that you can knit worsted weight yarn on a standard gauge machine. It’s true, but you must use only every other needle to do so, which means your knitting will be narrow and require piecing.

Patterning Capability

The next decision you’ll face will be what type of patterning capability you want. Knitting machines are capable of performing all sorts of fancy stitch techniques (see Part III), but use different methods to read the design you want to use. Early machines had little or no such capability, and the knitter had to pattern the design manually. Subsequent knitting machines use one of three different methods to automatically pattern: punchcard, mylar, and electronic.

Punchcard machines read a special piece of graph paper that has holes punched in it to represent the design to be knit. Mylar machines read a similar graph that is drawn on a clear piece of mylar. Electronic machines have a computer on board that can be programmed with the graph. The most critical difference, besides ease of use, is that the latest electronic machines are capable of reading a design the full width of the needle bed (200 stitches on the standard gauge). Punchcard machines are only capable of reading a graph up to 24 stitches wide per row, which limits the design choices. Electronic machines may also have garment shaping capabilities that tell the knitter when to increase or decrease.

When the knitting machine reads each line of the graphed design, it places the selected needles into the correct working positions to make the pattern. Regardless of type, any knitting machine will repeat the design, whatever size, over and over across the selected needles, unless it’s programmed by the knitter to do otherwise. In addition, when all the rows have been knitted, the machine will start over with the first row again unless the design is cancelled.

My advice to anyone buying a new machine knitting is to buy the best that you can, even if it’s more than you need right now, because trade-in values are very low. If you should decide later that you want more features, you’ll end up spending a lot more than if you just got them in the first place.

Next Installment…. Part II: How knitting machines work

Dyeing Yarn With Easter Egg Dyes

Dec 27th, 2009 Posted in articles | Comments Off on Dyeing Yarn With Easter Egg Dyes

by Sonja Record of Sonja Kathleen Contemporary Knitting

Easter egg dye (Paas) is another safe, easy and fun way to dye yarn (for a similar method, see my article “Dyeing Yarn with Kool-Aid“). Like Kool-Aid, it requires no specialized equipment, and is safe enough to do with small children. Since it’s actually food dye, you can even use your kitchen utensils without fear of contamination.

Choosing and Preparing the Yarn

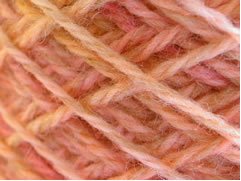
dip-dye methodPhoto 1: Overdye using pink and orange dye over a tan/white 2-ply wool yarn (dip-dye method).To begin, you’ll need a quantity of wool yarn. One of the great things about wool (and other animal fibers) is that it takes dye so easily and so beautifully. It’s really pretty hard to get bad results. Plant fibers such as cotton can be more difficult to dye, requiring a dye solution with a base pH, so these instructions are for wool only.
The yarn you choose can be thick or thin, natural or dyed. If you choose a previously dyed yarn, you should select one in a fairly light shade, since you want the Easter egg color to show up. Overdyes often result in a more subtle, sophisticated color effect. For example, you could place tan yarn in a pink dyebath, the resulting color will be more of a dusty rose color than a bright pink color (see photo 1).

You should choose enough yarn to complete the project you have in mind, since it will be fairly difficult to duplicate the results exactly. If you think you might want to repeat a color in the future, then you’ll need to make notes regarding exact quantities, times, and temperatures of everything you do.

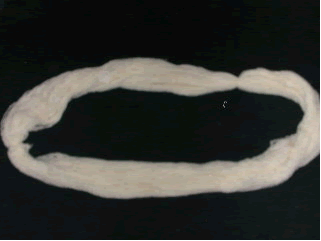
If you yarn comes in a center-pull skein, you’ll need to rewind it into a twisted skein or big loop to avoid the “tie-dye effect.” This allows the dye to come into contact with all parts of the yarn. (It’s amazing how protected the yarn at the center of a ball can be!) You’ll be handling the yarn a fair amount at rinse time, so tie the yarn in several places to avoid having a snarled mess when you’re done (see photo 2).

Looped skein tied in two places
Photo 2: Looped skein tied in two places.

Pre-wet the yarn by soaking it in cool water for about 20 minutes, then squeezing it out. This allows for quicker, more even dye penetration. If you want to try for a mottled look, you can skip this step and start with dry yarn, but it will take longer for the dye to saturate the wool.

Choosing and Mixing the Dye

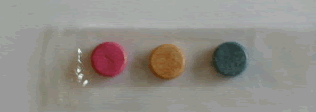
One of the main drawbacks to dyeing yarn with Easter egg dye is that it’s normally only available right around Easter. The best time to buy it is right after Easter, when many stores reduce the price dramatically in order to clear their inventory. Look for the kind that has color tablets (see photo 3), not paints or the cups that you just add water to. The brand I like to use is good old Paas (see photo 4), which actually says “pure food-color kit” right on the package. You can generally find these in 6 or 9-tablet sizes, and stock up when they sell for pennies on the dollar. If you have young children, they can have fun with all the other things that come in the kit.

Easter egg dye color tablets
Photo 3: Easter egg dye color tablets.
The other drawback to dyeing yarn with Easter egg dye is that you can’t always tell what color the dye will be based on the color of the tablet, and the instructions don’t tell you. They just assume you’re going to make one cup for each tablet and will find out at that time what color it is. If you just want green, it may take you a couple of tries to find the green tablet. If you’re open-minded about the color you get, if you want to use all of them, or if you don’t mind wasting a tablet if it’s the wrong color, then you’ll probably have more fun with this method. You can also mix your own colors from the basic colors.

Paas Easter egg dye
Photo 4: Package of Paas brand Easter egg dye. Note the everyday K-Mart price of $1.44. I bought this package for less than $.50 after Easter.

To mix the dye, follow the package instructions to dissolve the tablets. For Paas, you dissolve a tablet in 1 to 3 tablespoons of white vinegar. This also gives the dye bath an acidic pH, which is best for dyeing wool. After the tablet is dissolved, you add ½ cup of water to make the basic dye. You will then need to add enough water to cover the yarn you wish to dye, but this will dilute the color. I find that 1 or 2 tablets are enough to dye a sock-size amount of yarn in a light to medium color. I have even used what remains of the dye right after egg dyeing by diluting it with more water.

The colors themselves can be fairly bright (see photo 5), but there are several methods you can use to get more subdued results:

(1) Remove the yarn from the dye bath after a short time.
(2) Dilute the dye with more water than you need to cover the yarn.
(3) Use the overdye method by using a yarn that has already been dyed in a light color (see photo 6).

dip-dye method
Photo 5: Basic colors on natural white yarn (dip-dye method).

Overdye of blue and green dyes
Photo 6: Overdye of blue and green dyes over pale green yarn (dip-dye method).

The entire process is subject to a fair amount of trial-and-error, but that’s where the fun is.

Jar Method

I prefer to use the jar method instead of the baggie method with Easter egg dye since it can be a little messy. I like to do this in my kitchen with a layer of newspaper, plastic, paper towels or whatever on the counter, since Easter egg dye will stain and can be hard to scrub off. Wear gloves if you don’t want to dye your fingers (it wears off after a couple of days).

Mix the dye in a firm container that’s large enough to hold all your yarn. I like to use large glass jars for socks, but you can even use your pots and pans for larger quantities. The container can be glass, metal or plastic, but the plastic will be stained. Add the yarn and enough water to cover it. Let it sit until the dye is exhausted, which may take anywhere from several minutes to several hours. The dye bath is exhausted if all the dye adheres to the yarn, leaving virtually clear water behind.

If you like the color after only a short time, by all means remove the yarn from the dye and finish processing it. Remember that some of the color will rinse out, and the remaining color will probably dry a shade or two lighter.

After the dye bath, you can simply rinse the yarn in cool water, squeeze out the excess water, and hang the yarn to dry, or you can “cook” it to further set the color. To do this, place the yarn in a baking pan in the oven at 200 degrees for about 10 minutes. After removing the yarn from the oven, allow it to cool to room temperature before rinsing in cool water and drying. This avoids temperature shocking the yarn, which could result in unwanted felting or shrinkage.

This method will result in a single-color yarn, possibly with some variation in color saturation. If you’re not happy with it, you can re-dye it with the same or another color, or use the dip-dye technique described below.

Dip-Dye Method

The dip-dye method will allow you to use two or more colors on the yarn. Keep in mind when you select the colors that they will overlap and form a third color for a short area. So, if you choose blue and yellow, you will also have a section of green where these two dyes blend.

Use a separate container of the same height for each dye color. I find that tall jars work very well. Add the dye, place the jars right next to each other, and put half the yarn in each jar (see photo 7). If the section of yarn that’s out of the dye remains uncolored, you can “rotate” it part way through the process. Proceed as for the rest of the jar method.

Dip-dye method for 2 colors
Photo 7: Dip-dye method for 2 colors. This example shows way too much yarn for this set-up, but you get the basic idea.

The Wool Industry Faces a Prickly Question: Are People Allergic to Wool?

Dec 27th, 2009 Posted in articles | Comments Off on The Wool Industry Faces a Prickly Question: Are People Allergic to Wool?

by Mike Safley

It was Saturday afternoon and the Country Store was full of customers. I had volunteered to man the cash register while Julie fixed the children lunch. A tall blond lady, dressed in Levis and a cotton polo shirt entered the store. “Is Alpaca the same as wool?” she asked. “I’m allergic to wool.

This is a common question and I’ve always replied, “No, it’s not the same. Try one of our sweaters and you’ll see.” In fact, many people who are “allergic” to wool shop at our store. They are delighted that they don’t “react” to Alpaca.

As it turns out, over 30% of American consumers surveyed by the International Wool Secretariat reported that they were “allergic” to wool. After extensive study, scientists have determined that these consumers were not allergic to wool. The perceived allergic reaction to wool was actually a painful response by sensitive skin to coarse fibers. The consumers skin was being “prickled” by coarse guard hair or kemp-like fiber found in the wool.

Scientists have determined that it doesn’t matter whether a garment is made of wool, Alpaca, mohair, or man-made acrylics, if over 5% of the fabric is comprised of fiber with a diameter in excess of 30 microns, it will prickle or itch. Research has also established that once the average diameter of the fiber in a fabric or sweater exceeds 22 microns, the prickle factor begins to appear. In other words, the person wearing the garment begins to itch.

I now realize that when I told people that Alpaca wasn’t like wool and “no, they wouldn’t have an allergic reaction to it,” I was right — only because most all the garments in Julie’s store are made from baby Alpaca, which averages less than 22 microns. I would have been wrong if the sweaters were constructed of coarser fiber.

The “prickle factor” is a fairly recent discovery. Understanding the cause and how its effect can be minimized is an important issue for the Alpaca industry.

THE CAUSE OF FABRIC-EVOKED PRICKLE

Different sensory receptors in the skin are responsible for the various sensations we perceive as a result of the interaction of the skin and fabric. These receptors are classed as touch, thermal, and pain. The sensations perceived from clothes worn next to the skin will depend on how fabrics interact with these sensory receptors. The surface characteristics of fabrics have an important bearing on these responses. Some fabrics contain surface stimuli causing the skin discomfort, or PRICKLE.

Prickle results from high-load supporting fiber ends on the fabric surface indenting the skin sufficiently to activate pain receptors. The receptors responsible for fabric-evoked prickle are very close to the surface of the skin. The response of these receptors is a low level prickle sensation rather than pain. Prickle from fabrics usually has a pricking-itchy quality.

SKIN INFLAMMATION FROM PRICKLY FABRIC

Skin reactions from prickly fabrics may appear within one hour or more slowly after several hours of skin contact. They usually subside rapidly after removing the fabric from the skin unless skin contact over several days has produced a more severe reaction.

SENSITIVITY TO PRICKLE

The variation in sensitivity to a particular sensory phenomenon (light, sound, vibration, etc.) is determined by measuring the lowest value of the stimulus at which each person can perceive the sensation — the sensory threshold. In a recent test of fabric-evoked prickle, the sensory thresholds were determined for 55 people (28 males and 27 females) with ages ranging from 20 to 60 years. This work showed that a wide variation in sensitivity was evident.

Mean prickle thresholds determined for sub-groups within this population showed that males were less sensitive and had a higher variation in sensitivity to prickle than females and that prickle sensitivity decreased with increasing age. (See Table 1.)

Table 1

The Variation of Prickle sensitivity (thresholds) within the whole group, and between different sub-groups, in a population of 55 subjects.

Group

No. of Subjects

Mean Threshold

Stimulus Intensity*

Whole

55

5.4

Males

28

6.3

Females

27

4.5

Age 20-30

20

4.5

Age 30-45

24

5.7

Age 45-60

11

6.4

* The mean minimum number of high load-supporting fiber ends (per 10 cm2 of fabric surface) required for the prickle sensation to be perceived.

FIBER AND FABRIC PROPERTIES WHICH INFLUENCE PRICKLE

Work is currently in progress to define the properties of wool fibers and fabrics that contribute to prickle so that these properties can be selected and controlled to minimize prickle in next-to-skin garments. Any factor that reduces the buckling load of protruding fiber ends will contribute to a reduction in prickle.

Studies have indicated the importance of fiber diameter in skin irritation from wool fabrics. There is a high correlation between fiber diameter and the magnitude of prickle both in wool and acrylic knitted fabrics. A mean fiber diameter of 21 microns or less (with less than 5% of the fibers exceeding 30 microns) is necessary to reduce prickle intensity to a level which will not be perceived as skin discomfort by most people under normal conditions.

Under conditions which induce sweating, prickle sensitivity will be greatly increased and it is likely that even finer fibers would be necessary to ensure prickle at below detectable levels. This condition applies equally to acrylic and other synthetic fibers as it does to wool.

Fiber length is also likely to influence prickle. Short fibers intensify prickle since there will be more fiber ends per unit area of fabric surface. Prickle is reduced as mean fiber length increases. Fabric properties found to influence prickle are hairiness, structure, cover factor and processing method. Fabric hairiness is determined by the density and length of protruding surface fibers and both these properties are important in prickle. Processes such as brushing and raising are used to increase fabric hairiness. These operations cause a slight to moderate reduction in prickle (depending on how far they are taken) by increasing the average length of protruding fiber ends. Shearing, the fabric on the other hand, is extremely detrimental to prickle, since it shortens fiber ends and greatly increases their buckling loads, generating many new prickle stimuli.

Woven fabrics are more prickly than knitted fabrics. Fiber ends are less rigidly anchored in knitted fabrics because of the looser yarn construction. Woolen yarns also create more prickly fabrics than their worsted counterparts because they contain shorter and more randomly orientated fibers, which results in an increased density of protruding surface fibers.

COMPETING FOR CONSUMER PREFERENCE

Consumer requirements and preferences have been identified by a number of studies. Prickle and itch in garments is one of the most disliked comfort properties encountered by consumers. It is vital to manufacturers that yarns and fabrics have an absolute minimum of faults and that fabrics are suited to end-use requirements in terms of quality, tailorability, and comfort. Alpaca breeders should think about producing garments that merit high consumer preference ratings.

CASHMERE CACHET

The softness of fine cashmere depends largely on the extraordinary length and fineness of the hair of the kel goat (which originated in Kashmir, hence cashmere, an obsolete spelling of Kashmir). Cashmere fibers average 18.5 microns, one-third the thickness of human hair. The softest, finest, and most expensive goat hair is found in the eastern region of China’s Inner Mongolia.

Numerous attempts to raise cashmere goats in such places as Texas, Maine, and Australia haven’t worked. Americans and Australians feed their goats well, with the consequence that they grow thicker hair. The Monogolian goats live on a sparse diet and the hair is essentially starved for nourishment and therefore very fine.

Cashmere avoids any of the prickle stigma by requiring any fabric labeled as cashmere to average 18.5 microns and have no more than 3% of the fiber over 30 microns. As a result, the cashmere image is one of pure luxury and consumers look forward to its soft, comfortable feel.

POSITIONING ALPACA FOR THE HIGH END MARKET

If American Alpaca breeders want to create high unit value for their fleece production, they would be well served to study the prickle predicament of the wool industry. Alpaca is easily produced with a long staple at lower microns. Breeders need to select for low standard deviation and co-efficient of variation. Jane Wheeler’s work on mummified Alpacas discovered in Incan ruins found that these animals had 15 and 16 micron fleece, with a standard deviation between one and two.

After the Spanish conquered Peru, Alpaca breeding became disorganized and inefficient. Alpaca and Llama bred promiscuously and the resulting hybridization coarsened the Alpaca fleece. Today, the Peruvian textile manufacturers pay only on the basis of weight. There is no premium paid for fineness. Sheep breeders around the world receive a premium for fine wool and merino flocks produce wool with micron counts below 20. American breeders have the opportunity to use scientific measurement and selective breeding techniques to continually refine the domestic herd. Julie and I would be “tickled” to death if American Alpaca fleece became a standard of luxury around the world.

Needle Felting: All the Rage for Bear Makers

Dec 27th, 2009 Posted in articles | Comments Off on Needle Felting: All the Rage for Bear Makers

By Nancy Cavanaugh from busyparentsonline.com
published with permission 2003

Bear makers all over the world have been talking about needle felting (also known as dry felting) lately. It is a simple and easy-to-learn process that takes a lump of wool and turns it into a piece of felt that can be used to make a multitude of projects.

According to teacher and bear maker Kathy Hays, needle felting “is the matting of wool fibers with a specially shaped needle. A medium to coarse fiber is placed on a foam mat, then needles are poked into the wool. The needles have tiny barbs in the shaft so as the needle goes into the fiber, it drags the fiber into the other fiber. This ‘tangles’ the fiber to keep it firm.”

Kathy, who lives in Seminole, FL with her husband and two children, is a traditional felter but took up needle felting four years ago. “I use soap and water to create felt. Needle felting had been floating through the very small felting population, so I decided I wanted to know what the chatter was!” she said.

Felting has been Kathy’s primary focus. “During the past year and a half, I have really focused on making hand-made felt dolls and defining my own work. I create because I enjoy the act of creating,” she commented.

Fellow bear maker and needle felter Bobbie Ripperger, who hails from Illinois, has been needle felting for about as long as Kathy. “I’ve been a bear maker of miniatures under three inches since 1990. I bought my first needles three years ago but didn’t do much with them due to lack of time for experimenting,” she said. “August ’02, some family health situations improved and gave me some breathing room, just as I discovered that after twelve years of intense, twenty-five-stitches-to-the-inch-sewing, arthritis was affecting my fingers too much to continue work as I’d known it. Not wanting to give up my minis, I picked up the needles in August and made my first ‘something.’ It wasn’t turning out right, so I put it aside and made a rabbit based on one of my fabric patterns. I went right into realistic animals, especially polar bears.”

Compared with other crafts, Bobbie, who will be 61 in the Fall, said, “I think I’ve finally found my true art niche!

“When designing a teddy bear or other soft-sculptured animal in fabric, all of the design thought process goes on before the scissors touch the fabric. The ‘skin’ is then cut, sewn and stuffed, like working from the outside inward. In needle felting, one starts from the inside – the basic shape or skeleton — and builds up the muscles and final outer surface one bit of wool at a time. There is no pattern and it’s almost impossible to get identical pieces. These are truly one-of-a-kind works,” she continued.

Needle felting is a relatively inexpensive craft to start. “The cost to begin needle felting is cheap. It takes a few needles — an assortment is good — ten dollars for a dozen. Small quantities of wool fiber, perhaps another ten dollars,” Kathy said. “Needle felting is for beginners, it is simple and easy to learn.”

Bobbie recommends a foam cushion as well. “In the beginning (you should use) a foam cushion about twelve inches by fifteen inches by three inches, to keep from jabbing your hand, leg or tabletop with these very sharp points,” she said.

Bobbie thinks it is definitely something the family can do. “All of my grandchildren have sewn, knitted, crocheted and even tried tatting. Our fifteen-year-old grandson took one of my felted bases (the ‘skeleton’ inside) for a polar bear and turned it into a goose. Our eleven-year-old granddaughter tried it briefly but she lives twelve hundred miles away, so hopefully this summer she’ll have a longer go at it.”

A six-inch Noggins created by Kathy Hays using needle felting. Students can create their own Noggins in her class for beginning needle felting at Crafty College.

Kathy had a few tips for beginners. “Patience! For most people, learning to handle wool is the biggest hurdle. I come from a fiber background and know how to handle the carded wool, or roving. I have seen numerous students struggle with fiber. They want to treat it as a fabric, when in fact it is very flyaway. The other problem is that students want to work too fast and look for instant gratification after about ten minutes. To get a piece to look good, it takes time.”

Bobbie’s tips: “Take your time. Practice, practice, practice. Use your imagination and let the wool become what it wants to be. If you start off making a teddy bear but it looks like a frog, go with frog!”

Kathy began teaching needle felting online three years ago. “I am a fiber artist, doll artist, felt maker and bear maker,” she said. “I teach online at Crafty College and really enjoy the venue. I do offer workshops locally and do travel outside my home state to teach doll making or felt making.”

Kathy feels that online classes in needle felting can be as good as in person. “I teach it online and in person. When good instructions are given, [along with] plenty of photos, you can easily learn.”

Bobbie has also designed a course for needle felting. “I’ve developed an online class for students to work at their own speed. The kits are bought and sent to the students, then I send the class lessons individually to them when they’re ready. The kits are eighteen dollars and the class costs twenty-five dollars.”

For more information about the kits, classes or supplies, you can contact Bobbie by e-mail at RKR4CDS@attbi.com. You can also purchase needle felting starter kits and project kits from many online stores.

Sample pattern: http://www.mielkesfarm.com/ladybug_dir.htm

Needle felting is a craft that requires the use of a very sharp needle. This craft is not recommended for children under the age of 12. It is recommended that beginners wear band-aids on their fingers when first learning how to do this craft to minimize possible injury to their hands.

Wraps per inch method

Dec 26th, 2009 Posted in articles | Comments Off on Wraps per inch method

How to buy enough yarn using the Wraps Per Inch method

Ahhh, you’re looking at a fine skein of yarn, and don’t yet have a pattern or design. It’s on sale, it’s calling your name. You’ve got to buy it. How much to buy? Here is a simple method of determining how many yards of yarn you’ll need using the Wraps Per Inch (WPI) method:

wraps per inchWrap your yarn around a pencil, or ruler or any other similar object and count the number of wraps per inch. You can even make a tool with the inch marks indicated on the dowel but a ruler works great too since it’s already marked off. If you’re worried about pulling apart a skein you haven’t purchased yet, just lift up an inch worth of strands away from the skein without disturbing the hold. In this photo I wrapped around a pencil and measured against a ruler. There are 12 wraps over one inch so my WPI is “12”.
Wrap somoothly, with the yarn touching but not too tight. When measuring thicker yarns it’s best to do the wrapping over several inches and then divide (i.e., wrap over 3 inches and divide by 3). Once you’ve wrapped, calculate your number of wraps per inch (or WPI)

Refer to this handy chart A (or print and keep in your wallet!). This chart is for an average adult pullover sweater.

You’ll notice that the yardage is equal to the WPI X100 (12 wpi for worsted weight X 100 is 1200 yards you’ll need to buy). So if you can memorize this formula you can buy yarn anywhere, anytime.

To adjust the yardage for other sizes, add or subtract the % according to chart B

*See this link for determining gauge

Chart A: Yardage using WPI

Type
WPI
*Gauge in stockinette
(stiches per inch)
Needle size
Yardage
med sweater 36-38" plus 2" ease
lace
18+
8+
#00, 1, 2
1800-2200
fingering
16
6-8
#2, 3, 4
1600-1900
sport
14
5-6
#4, 5, 6
1400-1600
worsted
12
4 1/2-5
#7, 8, 9
1200-1400
bulky
10
3 1/2-4
#10, 10 1/2, 11
1000-1200
super bulky
8
2-3
13, 15, 16
800-1000

Chart B: Calculating other sizes

Size chest measurement Add or subtract
Child 25" or less subtract 30%
Ex. Small 28"-30" subtract 20%
Small 32"-34" subtract 10%
Medium follow chart above  
Large 40"-42" add 10%
Extra Lg. 44"-46" add 20%

Keep in mind for other sweater styles you’ll need to add or subtract. Here is a guideline:
Add 10% for cable designs or other similar textures
Add 30-50% of total yarn needed for fair isle or other designs requiring a yarn carry to the inside.

Dyeing Yarn With Kool-Aid

Dec 26th, 2009 Posted in articles | Comments Off on Dyeing Yarn With Kool-Aid

Kool-aid is a safe, easy and fun way to dye wool yarn. It requires no specialized equipment, and is safe enough to do with small children. Since it’s actually food dye, you can even use your kitchen utensils without fear of contamination.

Choosing and Preparing the Yarn

To begin, you’ll need a quantity of wool yarn. One of the great things about wool (and other animal fibers) is that it takes dye so easily and so beautifully. It’s really pretty hard to get bad results. Plant fibers such as cotton can be more difficult to dye, requiring a dye solution with a base pH, so these instructions are for wool yarn only.
[adrotate group=”1″]
The yarn you choose can be thick or thin, natural or dyed. If you choose a previously dyed yarn, you should select one in a fairly light shade, since you want the Kool-aid color to show up. Overdyes often result in a more subtle, sophisticated color effect. For example, you could place light blue yarn into a yellow dye bath, and the resulting green will be different than if you simply placed natural white yarn in a green dye bath.

You should choose enough yarn to complete the project you have in mind, since it will be fairly difficult to duplicate the results exactly. If you think you might want to repeat a color in the future, then you’ll need to make notes regarding exact quantities, times, and temperatures of everything you do.

If your yarn comes in a center-pull skein, you’ll need to rewind it into a twisted skein or big loop. This allows the dye to come into contact will all parts of the yarn. (It’s amazing how protected the yarn at the center of a ball can be!) You’ll be handling the yarn a fair amount at rinse time, so tie the skein in several places to avoid having a snarled mess when you’re done.

Pre-wet the yarn by soaking it in cool water for about 20 minutes, then squeezing it out. This allows for quicker, more even dye penetration. If you want to try for a mottled look, you can skip this step and start with dry yarn, but it will take longer for the dye to saturate the wool.

Choosing and Mixing the Dye

You’ll also need some packets of unsweetened Kool-aid or other brand drink mix. The colors are fairly predictable – for red, try strawberry or cherry. For purple or blue, try grape or blue raspberry. For orange, try orange or tangerine. For green, try lemon-lime. For yellow, try lemonade. For other colors, try mixing different flavors together. Feel free to experiment with whatever flavors you can find – that’s part of the fun. Some colors are harder to come by than others, and you may have to substitute or supplement with the kind of food coloring you can buy in the spice section at the market.
[asa]B001IZLULE[/asa]
How many packets you need is largely a function of how much yarn you want to dye and how dark you want to dye it. For a sock or scarf-size amount of wool and a light to medium color, one or two packets should suffice. It’s difficult to give exact formulas for the dyes, since so many variables besides amount of dye can affect the final result. The entire process is subject to a fair amount of trial-and-error, but that’s where the fun is.

Remember that in almost all cases, you will be mixing the flavors in a much stronger concentration than you would to drink them. If you still can’t get a color you like, try adding a few drops of food coloring. In general, when you mix the dye you want to have enough liquid to cover the yarn. If the yarn isn’t completely immersed, the results will be mottled (a nice look, too), and having an excessive amount of liquid will dilute the color and waste the dye.

Finally, for best results, add about ¼ cup of white distilled vinegar per quart of water to make the pH of the solution acidic. This step isn’t necessary, but wool accepts dye better under acidic conditions.

Baggie Method

So, let’s get started. I like to do this in my kitchen, but I do put down a layer of newspaper, plastic, paper towels, or whatever on the counter to minimize messes. Kool-aid may also stain fingers, mouths, and clothing, so wear clothes you don’t care about.

The easiest, most child-friendly method is to empty a packet of Kool-aid into a large zip lock baggie, add about a quart of cold water, put in the yarn (enough for a scarf or socks), and seal the bag. You can then squeeze it around until it’s well mixed and place it in the sun for several hours or all day if possible. The reason for placing it in the sun is that heat will help to set the dye, but it’s not so hot that little fingers will get burned.

Allow the bag to cool as much as possible before taking the yarn out and rinsing it in cool water until the water runs clear. The reason for this is to avoid temperature shocking the yarn, which could result in some unwanted felting or shrinkage. Squeeze out the excess water and hang the yarn up to dry, out of direct sunlight if possible. This method will result in a single-color yarn, possibly with some variation in color saturation.

If you’re not happy with the color, you can re-dye it with the same or another color, or use the dip-dye technique described below.

Stovetop Method

Cooking the mixture on the stovetop will set the dye better and more quickly than letting the sun cook it in a baggie. Simply place the dye mixture in a saucepan and add the yarn before turning on the heat. Heat the mixture to a gentle boil for 5 to 10 minutes, squeezing the yarn with a spoon or other implement to saturate it with dye. Be careful not to slosh the hot liquid on yourself.

Allow the mixture to cool to room temperature before removing the yarn and rinsing with cool water until it runs clear. As before, hang the yarn to dry.

Dip-Dye Method

The dip-dye method will allow you use two or more colors on the yarn. Keep in mind when you select your colors that they will overlap and form a third color for a short area. So, if you choose blue and yellow, you will also have a section of green where these two dyes blend.

Use a separate bowl or jar of the same height for each dye color. Add the dye, place the jars right next to each other, and put half the yarn in each jar. If the section of yarn that’s out of the dye remains uncolored, you can “rotate” it part way through the process. Allow the yarn to sit in the dye for several hours, or until the dye is “exhausted.” The dye bath is exhausted if all the dye adheres to the yarn, leaving virtually clear water behind.

If you like the color after only a short time, by all means remove the yarn from the dye and finish processing it. Remember that some of the color will rinse out, and the remaining color will probably dry a shade or two lighter.

After the dye bath, you can simply rinse the yarn in cool water and dry as before, or you can “cook” it to further set the color. To do this, place the yarn in a baking pan in the oven at 200 degrees for about 10 minutes. After removing the yarn from the oven, allow it to cool to room temperature before rinsing in cool water and drying.

References

Bourgeois, A. and E. Bourgeois. Fair Isle Sweaters Simplified. Bothell, WA: Martingale & Company, 2000. Has brief instructions and examples of Kool-aid dyeing on page 51.

Brown, R. The Weaving, Spinning, and Dyeing Book. New York: Alfred A. Knopf, 1978. Has general instructions on dyeing techniques.

Potter, C. and A. Xenakis. Handpaint Country. Sioux Falls, SD: XRX, Inc., 2002. Has general instructions on dyeing techniques.

Vickrey, A.E. The Art of Feltmaking: Basic Techniques for Making Jewelry, Miniatures, Dolls, Buttons, Wearables, Puppets, Masks, and Fine Art Pieces. New York: Watson-Guptill Publications, 1997. Has brief instructions for Kool-aid dyeing of both yarn and fleece on p. 22.